
Sometimes you visit a webpage, and when you hit “enter,” your browser shows you a 403 Forbidden error instead of your web page. This is a rather unfortunate error because the web server has understood your request but cannot fulfill it. After all, you do not have the necessary permissions to view the URL you request.
Unlike 500 internal server error, 403 Forbidden error is specific. It may as well be displayed in the following variations:
403 Forbidden
HTTP 403
Forbidden: You don’t have permission to access [directory] on this server
Error 403
Forbidden
HTTP Error 403.14
Error 403 – Forbidden
HTTP Error 403 – Forbidden
403 Forbidden -Nginx
403 – Forbidden Error – You are not allowed to access this site
HTTP Error 403 – Forbidden – You do not have permission to access the document or program you requested
Whatever the form, the error means the same – that you are not allowed to visit the page.
Now instead of getting into what causes this error, let’s directly see how to fix the error. These are the fixes that you can try:
-
Refresh The Page
Sometimes the 403 Forbidden error can be temporary. You can try if refreshing the page solves the error. This may sound over-optimistic, but sometimes the most challenging problems are solved by straightforward approaches. Plus, it takes just a second to hit the refresh button. If the error is resolved, well and good; otherwise, keep on reading.
2. Check For URL errors.
One of the common reasons for the 403 forbidden error is URL errors.
Ensure that you have entered a proper URL that ends with an extension or file name.
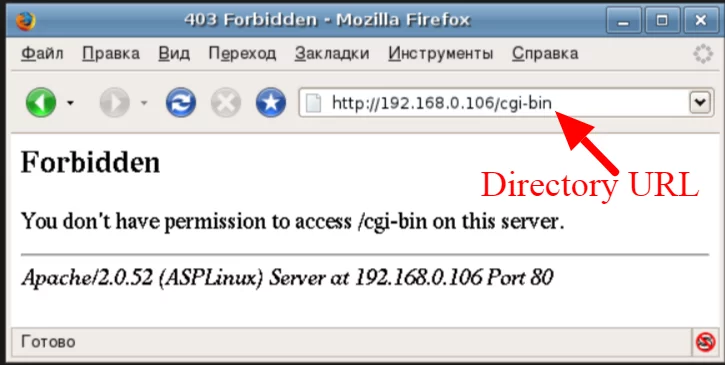
Make sure you are not entering a directory name. Many sites disallow directory browsing. This can result in a 403 Forbidden Error.
3. Clear Browser Cache
If all the above simple fixes fail, then try this one. You should see if clearing your browser cache can resolve the error. If you don’t know what browser cache is or you need to know how to clear browser cache, then we suggest you read this simple guide:
How to Clear Browser Cache in The Latest Versions of All Major Browsers.
By clearing the browser cache, you can check if the issue is with the browser cache. If it is, the error will be resolved at this step itself. If not, continue exploring the options.
4. Clear Browser Cookies
Sometimes clearing browser cookies can work as well. If clearing the browser cache does not solve the problem you can try clearing the cookies.
Here is how you can do it with Google Chrome.
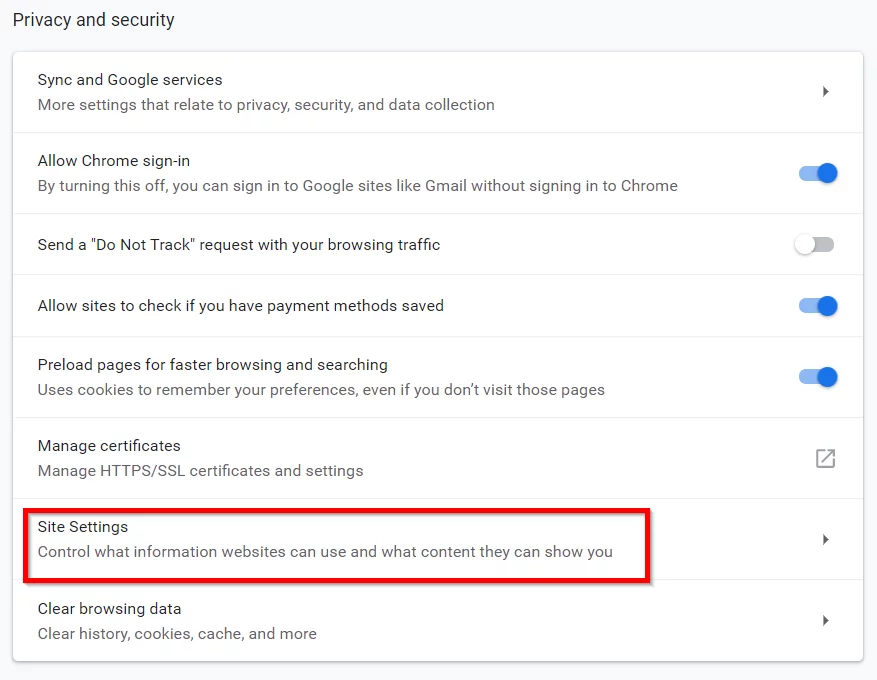
Go to Settings>> Advanced>> Privacy and Security
Select the “Site Settings” option.
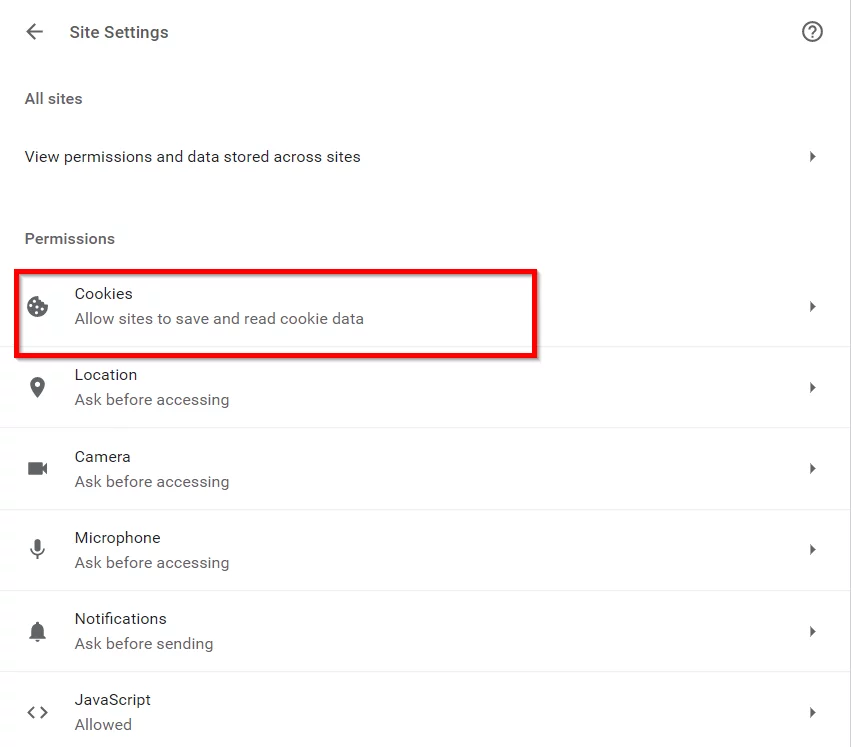
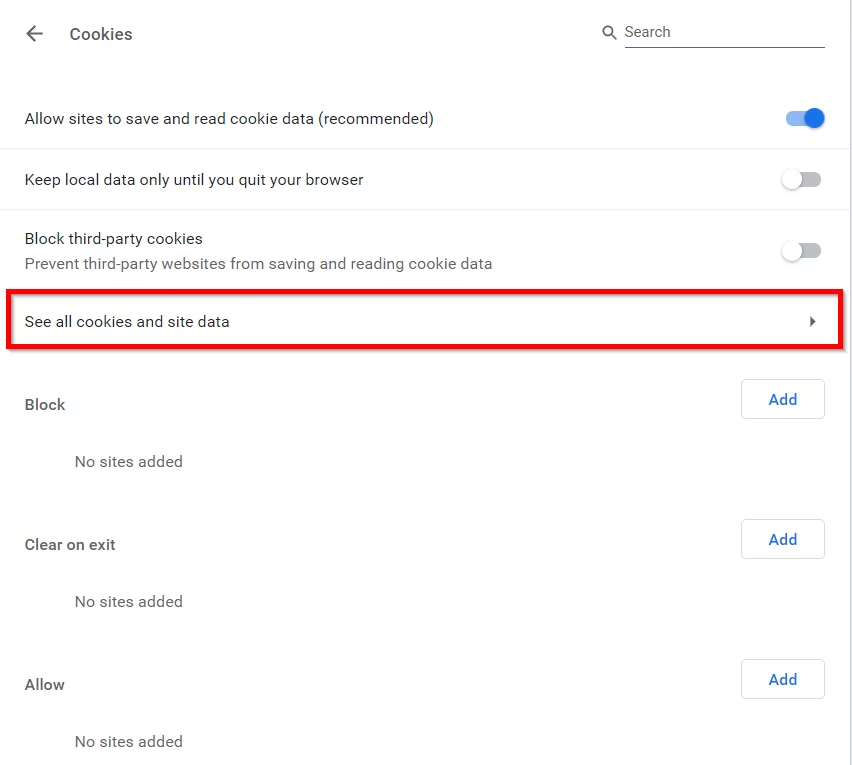
In the Site Settings screen, click on “Cookies”
The Cookies screen will appear. Select “See all cookies and site data”
Once you click the option, a list of sites will appear. Select your site and delete cookies.
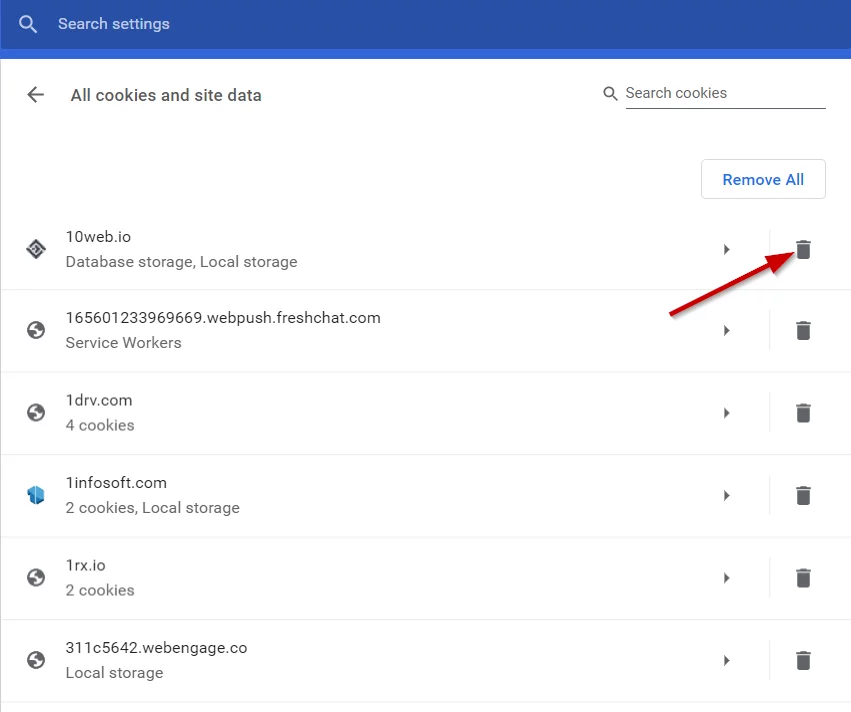
After deleting cookies, restart your browser and see if the error is resolved.
5. Deactivate All Plugins
Sometimes one or more plugins can cause the 403 Forbidden error. In such a scenario, you can try deactivating all plugins and see if the error goes away.
In case you can access the admin area of your WordPress site, you can manually deactivate each plugin.
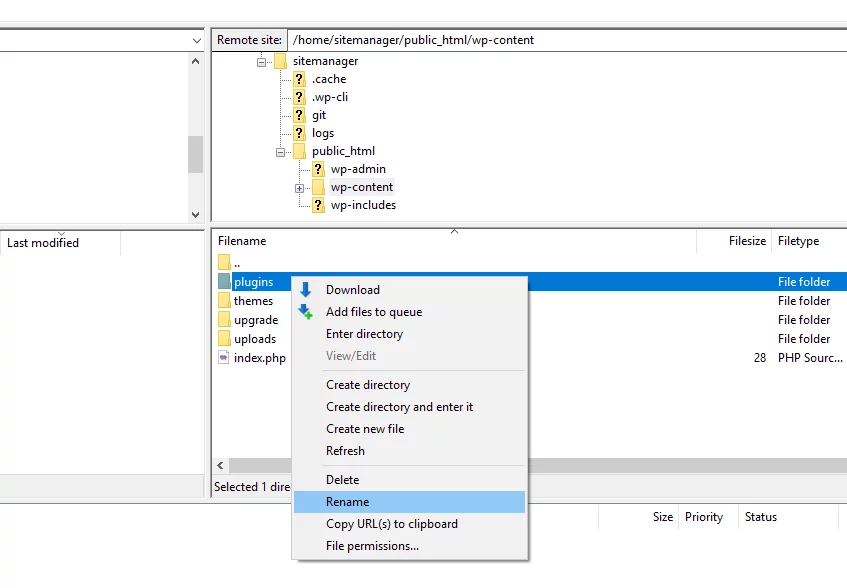
If you are not able to access the WordPress admin area, then you can connect to your site using an FTP client.
Once you are connected, go to the wp-content folder. In that folder, there is a folder named “Plugins”. To deactivate the plugins on your site, simply rename the folder to something else. For example, you can rename the folder as “Plugins_old”.
Once your plugins are deactivated, you can see if the site is working without any error. If the error is resolved then you can be sure that one of the plugins was the cause of the error. You can narrow down the culprit by activating each plugin one by one and checking the error at the same time.
If your web host supports WP CLI then you can deactivate all the plugins without having to access the plugins folder. Nestify’s Managed WordPress Hosting supports WP-CLI.
6. Check if the htaccess file is corrupt
Sometimes a corrupt htaccess file may throw an error like 403 Forbidden error. How to resolve the error in such a case?
Follow these steps:
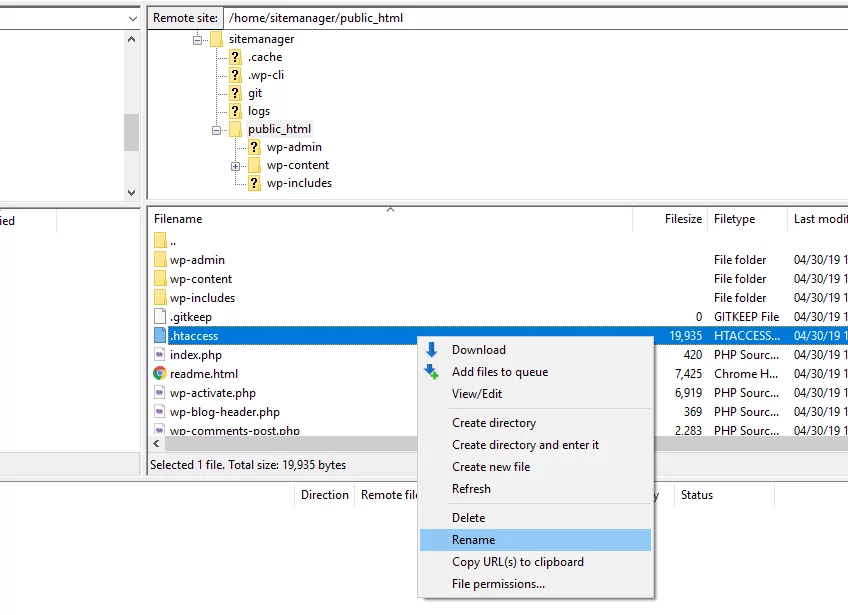
- Connect to your site using FTP and locate the .htaccess file
- Rename the file. For example, .htaccess_old
Check your site and see if the problem is solved.
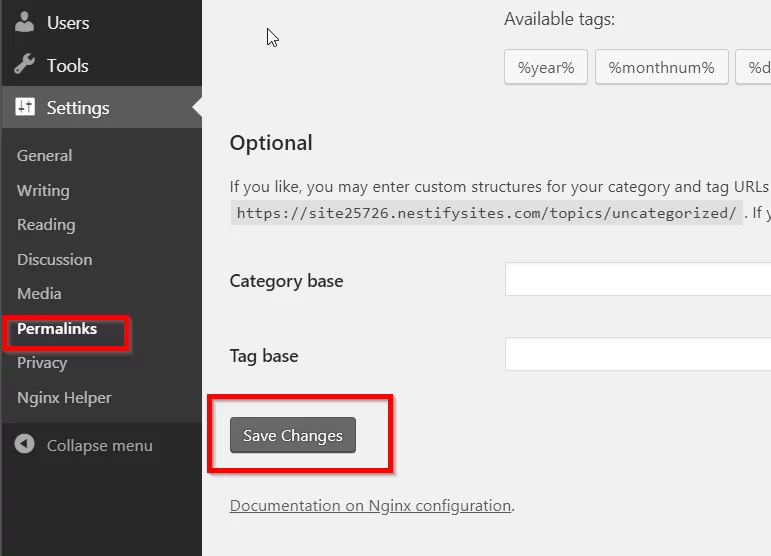
If yes, then you just need to do one last thing: Go to Settings>>Permalinks in the WordPress Dashboard and “Save settings” without making any changes. This will create a new .htaccess file with proper rewrite rules that will work well with your site.
7. Change File Permissions
The only remaining fix for you to try is to change upload folder permissions.
How to do that?
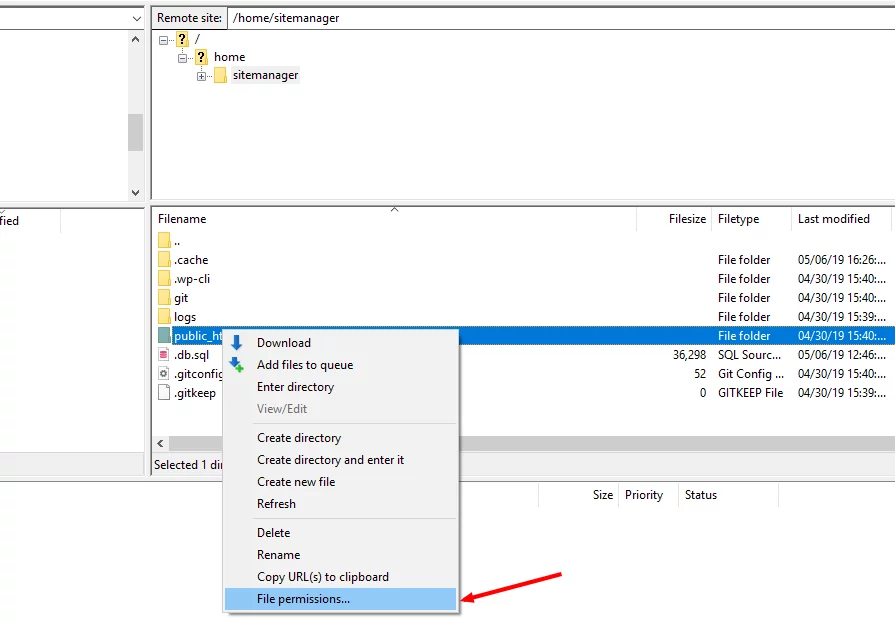
- First, connect to your FTP site using an FTP client.
2. Go to the root directory of your WordPress site.
3. Select all the folders in the root directory. Right-click and select “File Permissions”.
4. File Permissions dialog box will open. Enter 755 in the “Numeric Value” field.
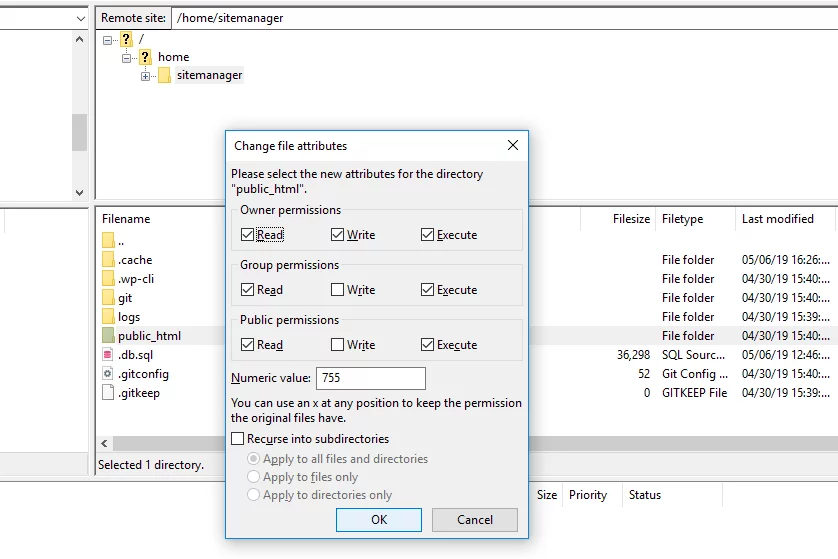
5. Tick the box that says “Recurse into subdirectories.”
6. Select the “Apply to directories only” option. Click on “OK.”
This will change the file permissions for folders. To change the permissions for files, repeat step 3 while selecting files. In the Numeric value, the field enters 640. Check the “Recurse into subdirectories” option and like “Apply to files only.” You have successfully changed the file permissions now.
This should resolve the error for you. If you are still getting the error, you need your web host’s help.
8. Reach Out to Your Web Host
We are often inclined to take matters into our own hands when we can do little about it. If you have exhausted all the above actions and don’t know what to do next, you should reach out to your web host.
Most web hosts are available 24/7 through live chat, phone, or email. Reach out to the support and see if they can help. They should be able to come up with a solution.
With these steps, you can certainly get rid of 403 Forbidden errors. Did you find another fix for this problem? Do share with us in the comments.
