
Did you know that about 500 million tweets are published daily? This means that no matter how good is your tweets, it is likely that it will not be noticed. The same applies to other social networks. Your shared updates can simply get lost in the feeds. That is why it is worth to repost your best content several times.
In this article, we’ll show you how to do this automatically using the free and easy plugin: Revive Old Post.
Why do I have to share the old Content?
The first reason to re-repost old entries is to establish better communication with existing readers. There are two main reasons why the readers do not see your post:
- Shared updates got lost in their feeds. Or because many social networks have reduced the scope of the organic reach, and it may never appear in the top of the feeds.
- Your readers are living in different time zones and were not online when you published the post.
Repost your content can solve both of these problems. You can publish it in the usual time for yourself so that readers could still see it, and you can also re-post it at other times so that users from a different time zone can see it as well.
Another reason to repost content is to attract new readers. If your readership grows, your blog will grow. This means that your new fans never see your old records. Re-publication of content allows new readers to evaluate your old posts.
As far as I have observed, even posting old content on Twitter gains a significant amount of retweets (although not as much as the first time).
Repost content from Revive Old Post

Revive Old Post: A popular plugin that allows you to automatically share your content. With the free version of the plugin, you can:
- Share new and old posts
- Select the minimum time between the publications of articles
- Select the number of posts to repost
- Use the special hashtag for the re-publication of these articles
- Insert link to your website
- Exclude category or specific articles from the list
If you are lucky enough to own a premium version, you also get support for custom record types, the ability to use multiple social networking accounts, LinkedIn support and much more.
For this article, we will use the free version.
Installing and configuring Revive Old Post
You can set Revive Old Post, just like any other plugin. Once activated you will see a new tab in your console:
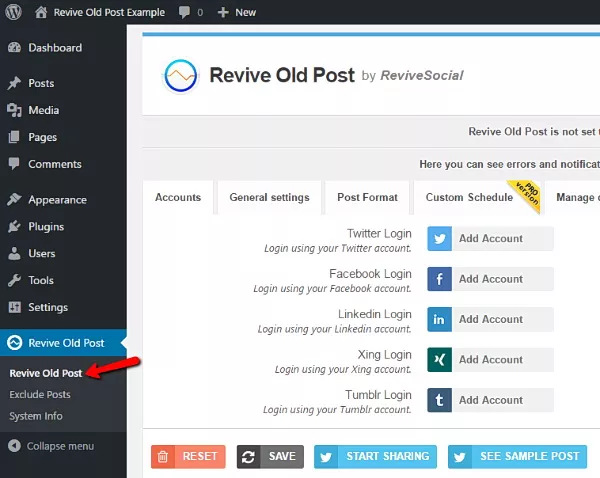
That’s all you can do in this tab:
- Accounts – set up social networks to automatically publish.
- General settings – Set the details of, for example, the minimum time between the publications of articles, how can repost old records and more.
- Blog Format – Select the format and content that you want to share.
- Schedule (Only the premium version) – Create a custom schedule for content.
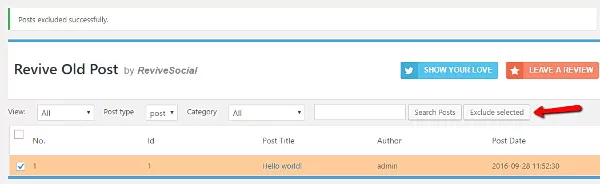
With “Exclude Posts” tab, you can select posts that you do not need to automatically repost:
Connect your social media profiles
The first thing to do after activating Revive Old Post is connected with social network accounts that you want to use.
To get started, go to the main page of plugin settings. And just click Add Account on desired social network:

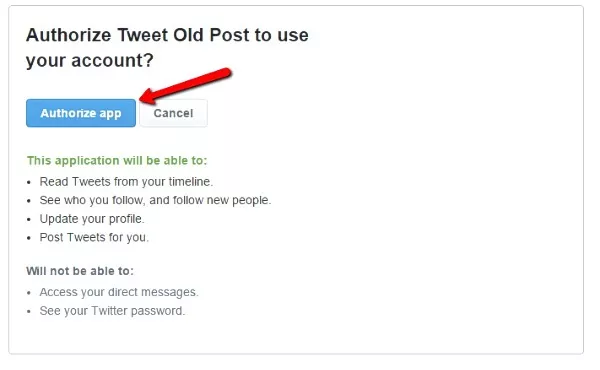
Then Revive Old Post will ask you to give permission to use the social network. For example, if you want to add an account on Twitter, you will need to authorize the Revive Old Post as follows:
Set up auto-publishing
After connecting social networks, you can configure a schedule for publication of your records. To do this, go to General Settings Tab :
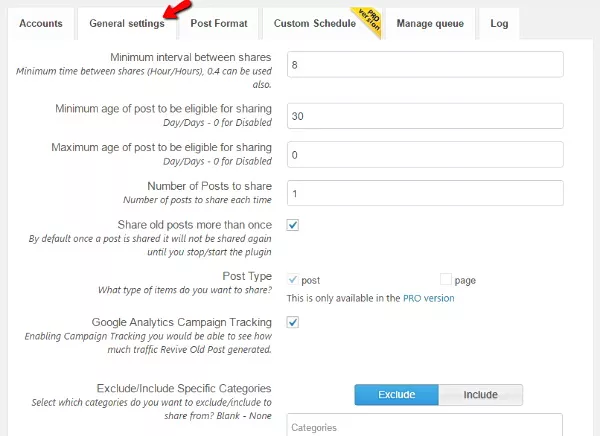
Here’s what you have to adjust:
- The minimum interval between the shares – set the minimum length of time between publications. For example, if you want to plug your content shared no more than once in 4 hours, enter “4”.
- Minimum entry age – set the minimum number of days from the date of publication. For example, if you do not want to repost record in less than two weeks ago, then enter “14”.
- Maximum entry age – set the maximum number of days from the date of publication. For example, if you do not want to repost entries that are older than three months, enter “90”.
- A number of posts – set the number of posts, which should be published at a time. Standard “1” is probably the best option.
If you want a more detailed setting, you can also include or exclude categories, select the image size and set the statistics.
Select the appearance of posts
Now it’s time to configure how the plugin will publish the entries. You can do this in Post Format tab:
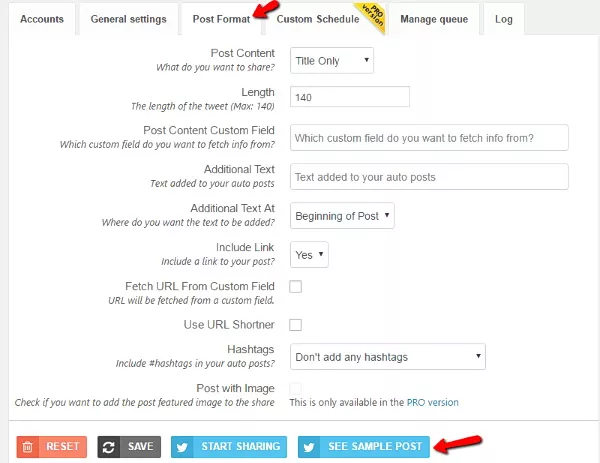
Here, you definitely want to configure:
- Content recording – select which part of the content to insert. Usually, the best headline.
- Additional text – you can insert an extra piece of text at the beginning or end of the articles.
- Setting the URL – decide whether or not you want to insert a link in your account, and whether you want to use a URL.
- Hashtags – Select hashtag, which will be inserted automatically.
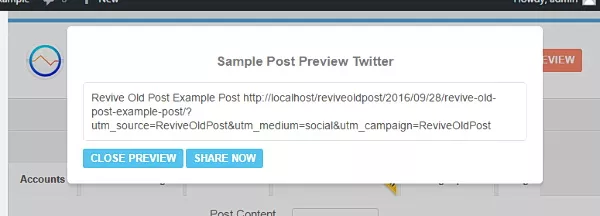
Now, when you’re done, you can press the SEE the SAMPLE POST, so you will see an example of your future repost:
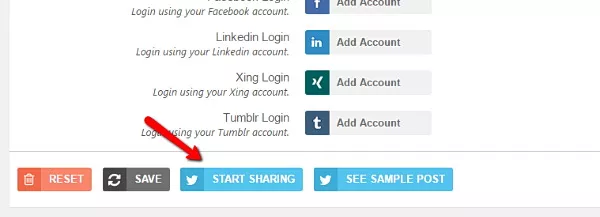
Repost home
If you are satisfied with the preview, then feel free to press the START SHARING:
Revive Old Post will provide you with a countdown and let you know when the next entry will be published:
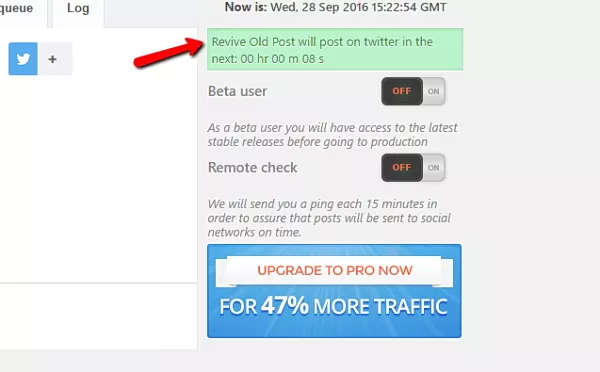
Remember that Revive Old Post will repost your entries according to rules that you set in General Settings tab.
And if you want to exclude some kind of record, then just go to the Exclude Posts.
Results
Setting Revive Old Post will take you 10-15 minutes. And as soon as you finish the setting, the plugin will work in the background and will repost all your old posts.
As you can see, configuring this plugin is very easy, you can use this plugin but make sure you do not overlook other ways to interact with users.
