
Because safety is first and if you have already been violated, it is possible that even if you have left the problem, remains white and sooner or later, again suffer this. Therefore, a security plugin might be more than a good idea. And what better than the most used WordPress plugin for security.
Before starting to set up Wordfence Security, we have to give our e-mail because it will use it to send us security notifications strictly of our website.
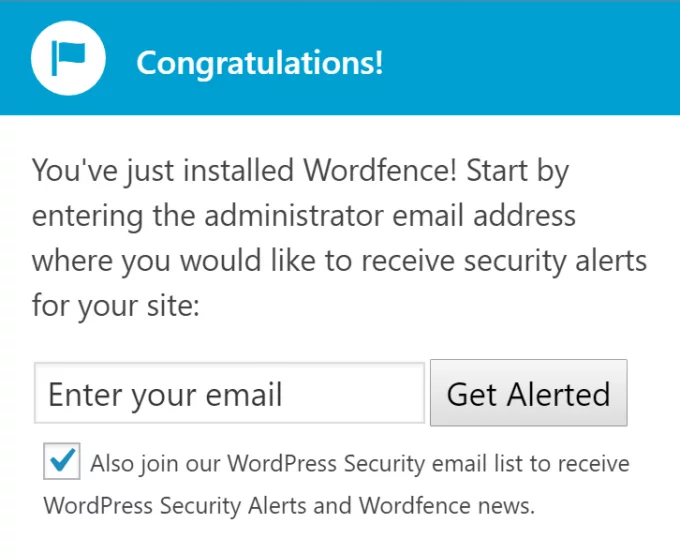
Enter your email in the corresponding field and click on Get Alert. Then close the notification. We will put things very secure by setting advanced security measures for login.
STEP # 1: ESTABLISH THE SECURITY MEASURES OF SIGN-IN
Let’s start by clicking Wordfence> Options and searching for the Basic Options. Below, locate and check the box that says Enable Logon Security:
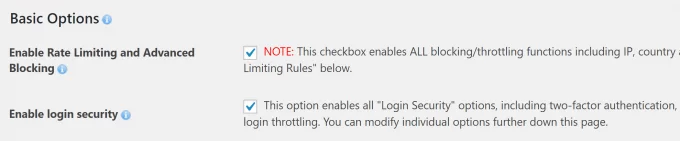
Doing so will allow all basic login security elements, strong password requirements, and additionally login limits.
With that care, go down until you reach Security Session Options:

The default Wordfence security login options are fairly robust – forcing administrators and authors to use strong passwords, preventing the opening of login errors, and blocking users after too many connection attempts.
The only option we would like to change is the number of attempts it takes for users to temporarily block since 20 is too high (in our opinion). Once the settings are updated, go to the bottom of the page and click Save Changes.
STEP # 2: HOW TO PERFORM AN EXPLORATION OF THE WHOLE SITE
Wordfence Scan allows the plugin to take a look through your site to find any malicious code or infection patterns. It is essentially the same as using an antivirus application to scan your computer – which can be used to locate and fix existing vulnerabilities, but it is always best to scan your site regularly, just in case.
To use this feature, you have to go to Wordfence / Scan and click on the start of a Wordfence Scan at the top of the page:
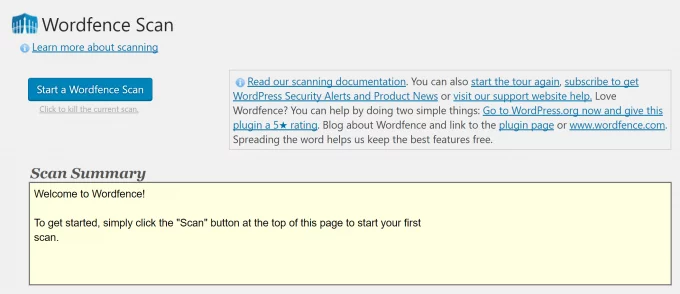
The yellow boxes will show the progress and results of the scan.
If the scan finds a vulnerability problem in your WordPress site, you will be presented with the option to remove or restore any infected file to its original version. What you need to do in this case is up to you, but you will already be aware that deleting critical files could potentially also break your site. Faced with such a situation and in most cases restoring a clean backup could be a solution.
STEP # 3: SETTING SAFETY ALERTS
When configured, the plugin will send you notifications for various security issues. To set this option goes to Wordfence / Options and scroll down until you find the Alerts section:
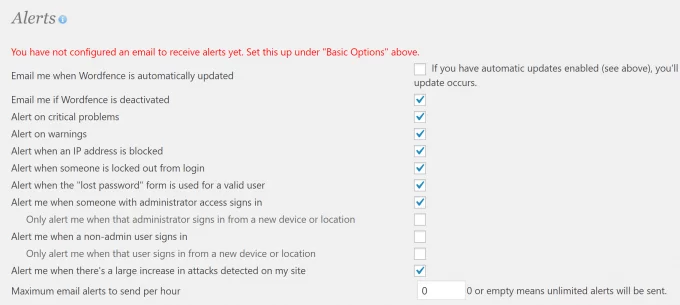
Most of the default options seen above are excellent from a security point of view, but others can be a bit annoying if you receive emails every time they appear. For example, it is recommended that you disable the option to receive an alert every time someone uses the ‘lost password’ function. It is a relatively standard event, and in most cases, will only result in increasing spam emails in your inbox.
The same applies to alerts that receive signals when there is a new administrator. Depending on the number of administrators of your WordPress site, this can become very difficult to manage, so unchecking the corresponding box is a good idea. Instead, activate the option on the right below, which alerts you when the administrator registers as such from a new device:

In this case, it can be quickly evaluated if a login manager is out of the ordinary depending on its location and the device being used. It is much more practical than the default, and all you have to do is tick a box to change it.
WordPress security is not something to be taken lightly. As big as the platform is, it is not 100% sure but, as we mentioned above, it is something so normal and obvious since criminals are always where there is life and not where there is not.
And what security plugin do you use in your WordPress? Share with us in the comment box.
