To protect a WordPress site from hackers is a difficult task. In reality, there is no single solution that could guarantee you 100% safety.
Studies show that tens of thousands of sites are hacked every day. Of course, first of all you need to protect your own website and data. But we should also keep in mind the safety of the data of visitors. Site owners who do not take proper precautions, as a rule, faced with a significant decrease in traffic and a very long time to lose its credibility. It has happen with sites of all sizes, even large Internet shops.
Make your WordPress site’s Load Blazing Fast Just by moving to Nestify. Migrate your WooCommerce Store or WordPress Website NOW.
Let’s get started.
Precooked
Before you make any changes to your site, it is best to make a backup. This will avoid unpleasant situations, if at any moment something goes wrong. If you do not have a plugin, which regularly makes backups of your site, you can simply copy the .htaccess configuration file in the root directory of your site, as we will make changes to it.
What is Static IP-address?

As the name implies, the static IP-address – this IP-address, which does not change. This means that you, as administrator, go to the admin panel from the same IP-address, and you can restrict access to it to other users, whose IP-address will be different from yours.
Those who constantly visits the site and manages them with one or more places, can use the material in this lesson to prevent hacking of the site. In this scenario, the IP-address (or addresses) that has access to the site remains static.
Let’s move on to the lesson.
Beginning of work
In this section, we will prepare your site for further changes, which we will do in the .htaccess configuration file and define the IP-address you use to login to WordPress website.
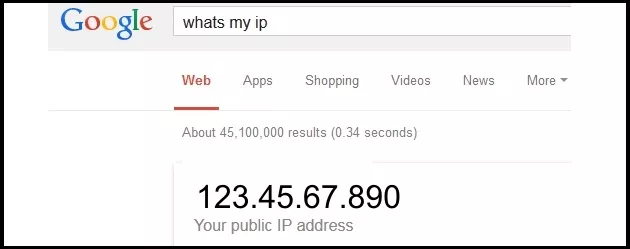
Go whatsmyip.org, to determine your IP-address. Copy and paste it into notepad, it will be needed later.
Locate the .htaccess configuration file of your WordPress site, you can find it in the root-directory of your site. If you do not have a .htaccess configuration file, create it yourself.
You can use a text editor that is built into cPanel or any other that you have on your device, the same notepad, for example.
Also, make sure you copy the entire code for this lesson in the beginning of the .htaccess file. Thus, you do not make unnecessary changes to the settings on your site.
Set IP limits using a static IP-address
If you ever come to your site from one or more jobs, you can perform the following steps to install IP-limits. The principle of this method is that we will create a white list of safe (allowed) addresses that have access to the admin area of your site. You can add or delete the IP-address from this list as needed.
In principle, all people with IP-addresses on the list will be able to log in and enter the admin panel site.
How to set IP restrictions, using static IP-addresses?
Follow these three simple steps to set up an IP restriction using the desired static IP address.
1. Open the .htaccess configuration file of your WordPress site
2. Copy and paste the following code on the top in .htaccess file
On RewriteEngine
RewriteCond% {REQUEST_URI} ^ (. *)? Wp-admin $
RewriteCond% {REMOTE_ADDR}! ^ 23.456.789.10
RewriteCond% {REMOTE_ADDR}! ^ The IP Address InsertTwo $
RewriteCond% {REMOTE_ADDR}! ^ The IP Address InsertThree $
RewriteRule ^ (. *) $ – [R = 403, L]
3. Save the changes you have made to the .htaccess file
Code Editing
To modify the code to suit your specific addresses, all you have to do is to make changes in line 4 and 5 and add the IP-addresses that will receive access to your login page.
To do this, simply replace the IP Address InsertTwo $ and IP Address InsertThree $ at the address that you have chosen. IP-addresses to which you are replacing must be in the format specified in line 3. Line 3 – it’s just an example with the already inscribed IP address, which you can replace.
You can add more addresses, duplicated line 4 and adding a new IP, or vice versa leave only one address, removing extra lines.
Conclusion
As we have said, there is no single solution that could 100% guarantee that your site will not be broken or will not face any security threat. However, by setting the IP restrictions on the WordPress login-page, you will be able to protect it against any possible attacks that use brute force.
We hope you enjoyed this tutorial and was helpful. After completing these simple manipulations, you can increase the security of your site, making limited IP-addresses.
Does your WordPress site have security issues? What steps do you take to protect it from threats?
Share your tips and experiences with us.
Note:
If you are looking for Managed WordPress Hosting that is isolated from other users on the server, We provides you with everything for which you have been waiting for. Our hosting is built on a blazing-fast SSD latest hardware That’s Highly tuned for optimum performance. The hosting includes daily backups, anytime money back, 99.97% uptime and 24×7 support.


