
When you migrate to a new host or change your domain’s nameserver settings, it takes time for these settings to take effect. One of the reasons is the time required for DNS propagation. You cannot access your site using your domain name until DNS propagation is complete. You can preview your website even before DNS propagation is complete by editing the host’s file on your local computer. This article will show you how to edit the host file to preview your site.
How To Edit Hosts File
The host file is a plain text file found in computers running on Windows, OS X, etc. It maps domain names to specific IP addresses. In this method, we map the IP address we know to our domain name so we can preview the website.
You will need administrator access to edit the host’s file. Editing is pretty simple, as you must insert a line of text at the end of the host’s file.
Edit Hosts File Windows
Follow these steps to edit the “hosts” file in Windows.
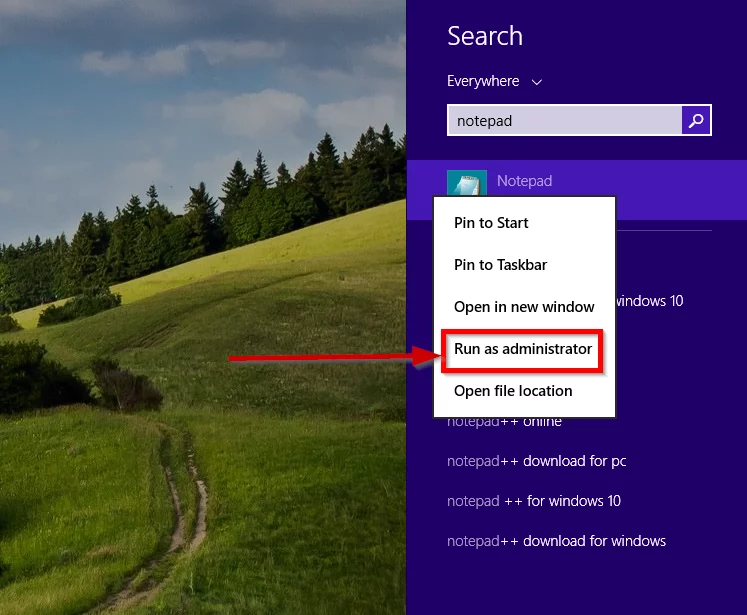
Step 1: Search “Notepad” in Windows Search, Right-click on the “Notepad” icon, and select Run as Administrator.
Step 2: Click on “File>>Open”. Browse the following location:
C:WindowsSystem32driversetc
Step 3: Select the etc folder
Step 4: To see the host file, Change the file type from *.txt to All Files
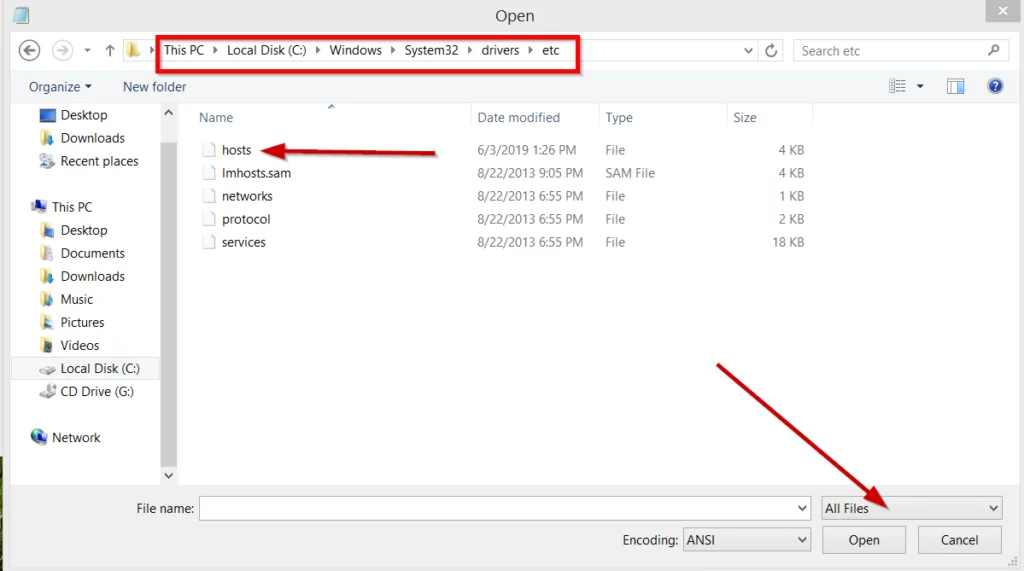
Step 5: Select the “hosts” file and open it
Step 6: Go to the last line, Add the server IP address, your domain name, and its www version
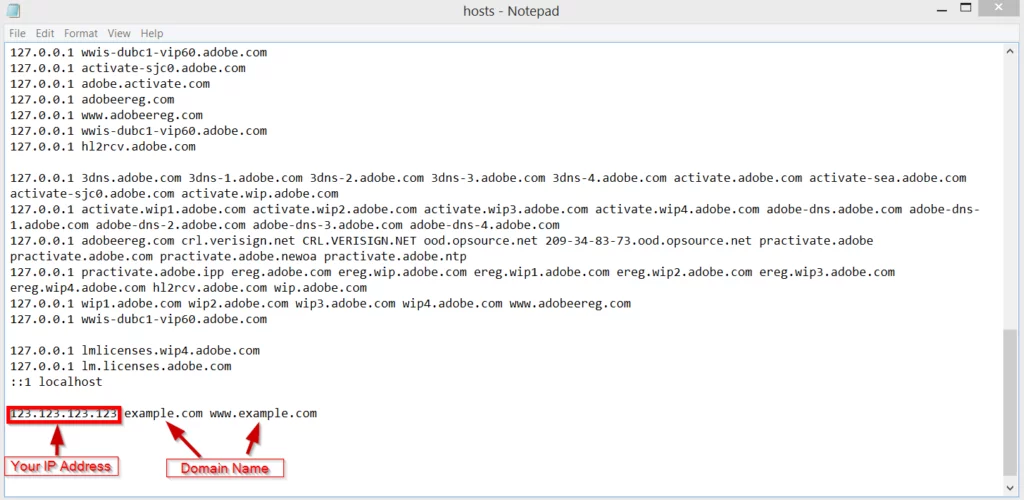
Step 7: Save the file
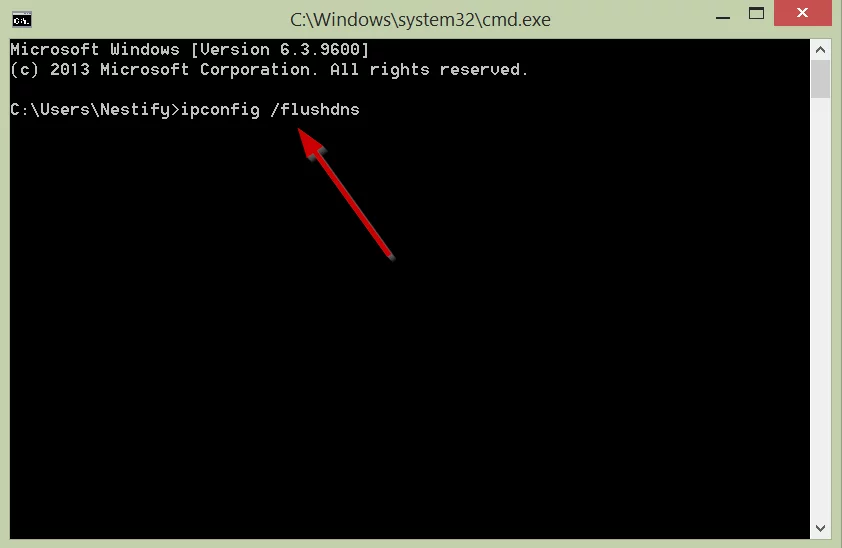
Step 8: Flush DNS Cache
A) Open “Run” (Windows+R). Type “cmd” and click ok. This will open the command prompt.
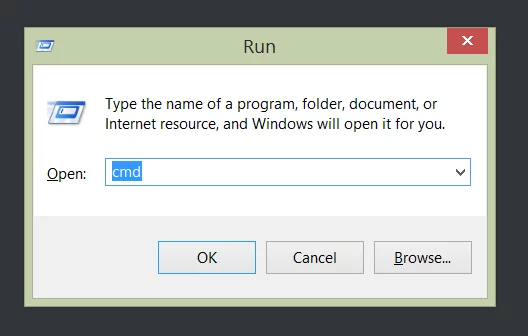
B) In the command prompt, run the following command:
ipconfig /flushdns
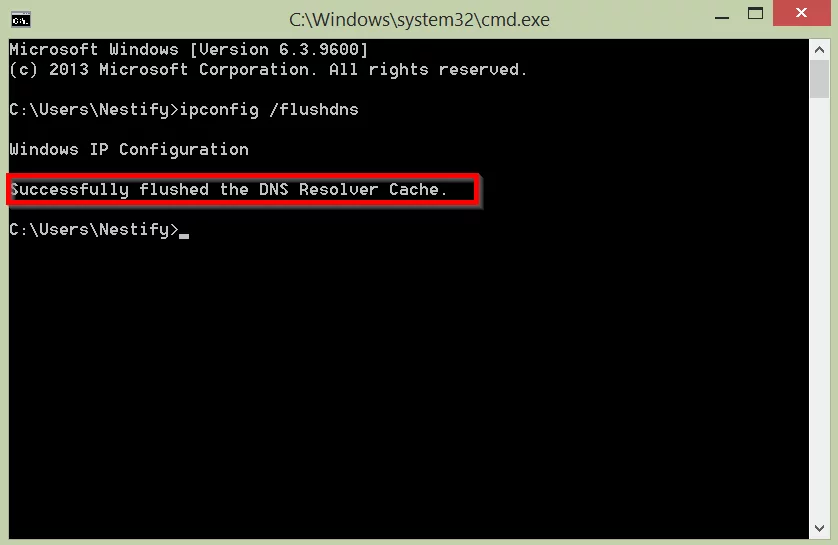
C)Hit Enter. You will get a success message once the DNS cache is clear.
Step 9: Open your browser, enter the website’s address and explore your site.
Edit Hosts File Mac
Step 1: Open the Terminal Application
Step 2: In the Terminal window type the following command:
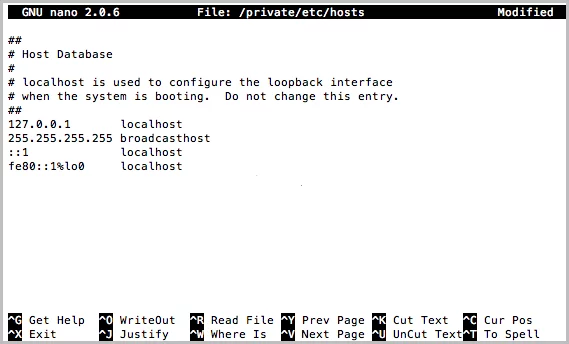
sudo nano /private/etc/hosts
Step 3: If prompted, enter the password to open the “hosts” file
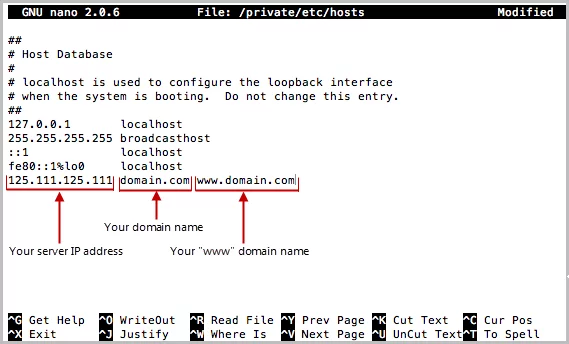
Step 4: Go to the last line, Add the server IP address, your domain name, and its www version
Step 5: Press Ctrl+O to save the Hosts file
Step6: Flush the DNS Cache
Enter the following command in the Terminal:
sudo killall -HUP mDNSResponder; sleep 2;
Step 7: Open your browser, enter the website’s address and explore your site.
You now know how to edit the host file on Windows and Mac. Editing hosts file lets you preview your site on your local machine. Let us know if you find this method useful. If you have any doubts, please reach out to us in the comments.
