
Do you want to install WordPress locally on your Windows machine? Over the years, this has become pretty easy. You can use a Windows web development environment like WAMP to run WordPress locally on your Windows computer. In this tutorial, I will guide you step by step to install WordPress with WAMP.
Let’s get started.
Step 1: Download WAMP server
The very first thing you need to do is to download WAMP server.
Visit https://www.wampserver.com/en/.
Click on “Start using WAMP server”
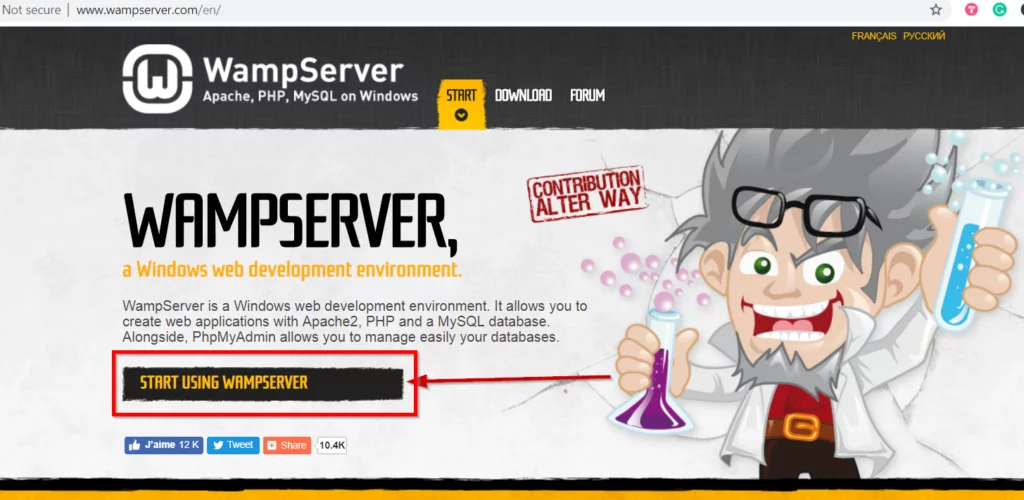
This takes you to the Download Page.
Select an appropriate file to download (32bit or 64 bit as per your system configuration)
Step 2: Install WAMP
Right click on the installation file and select “Run as Administrator”
The setup will begin. Choose Language and follow the instructions on the screen.
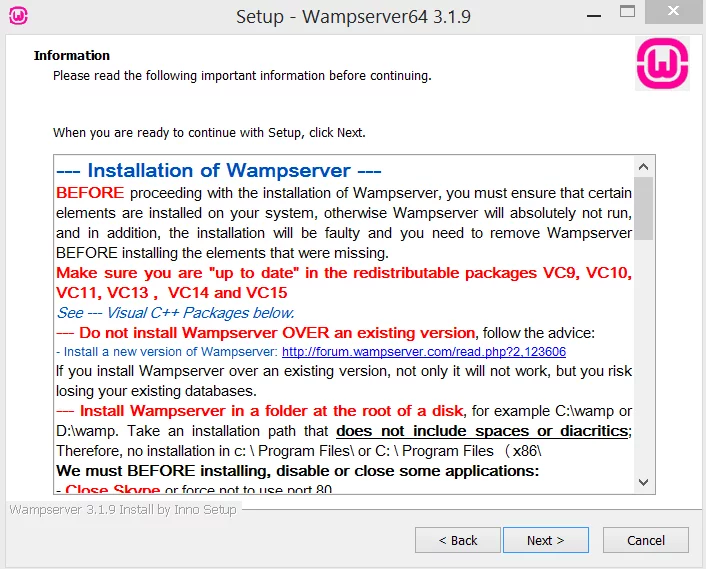
You will encounter a screen that mentions prerequisites for installation.
Make sure you have updated your system as per the prerequisites and hit Next.
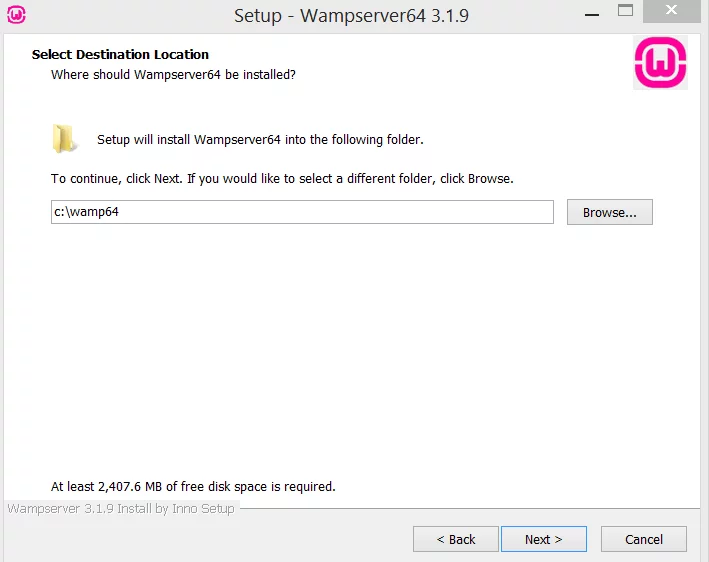
Make sure you are installing WAMP in the root directory. Install WAMP in C:\ or D:\ or E:\. Do not install it in a subfolder like C:\Programs.
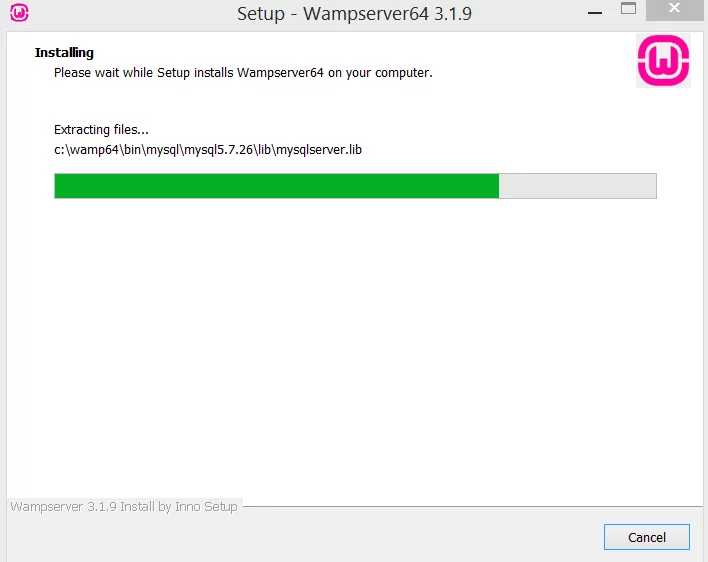
The installation will begin.
WAMP uses Internet Explorer as the default browser. It will show you an option to change this setting.
You can change the browser by going to the programs folder and selecting the browser of your choice.
You can also change Notepad as the default text editor. Simply select the text editor of your choice and click “OK”.
Once you make these choices, the setup will complete quickly.
Click on “Finish”.
You have successfully installed WAMP.
Step 3: Set up phpMyAdmin
In your notification panel, you will see a WAMP icon. It will be green, orange or red.
If it is not green, it means one or more services have not started. Click on “Start All Services” option. You will see the icon turning green, this means you are good to go. If not, then you can be sure you messed up somewhere in the setup. (Make sure you have all the system requirements as mentioned in the note that is displayed during the installation process)
From the options, select phpMyAdmin
Your web browser will open and you will see the login screen of phpMyAdmin.
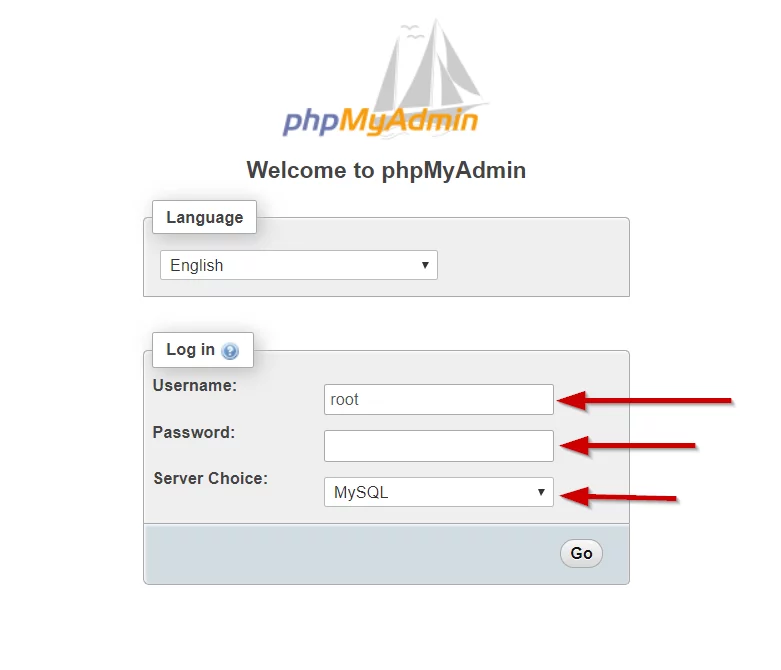
Enter the following credentials:
Username: root
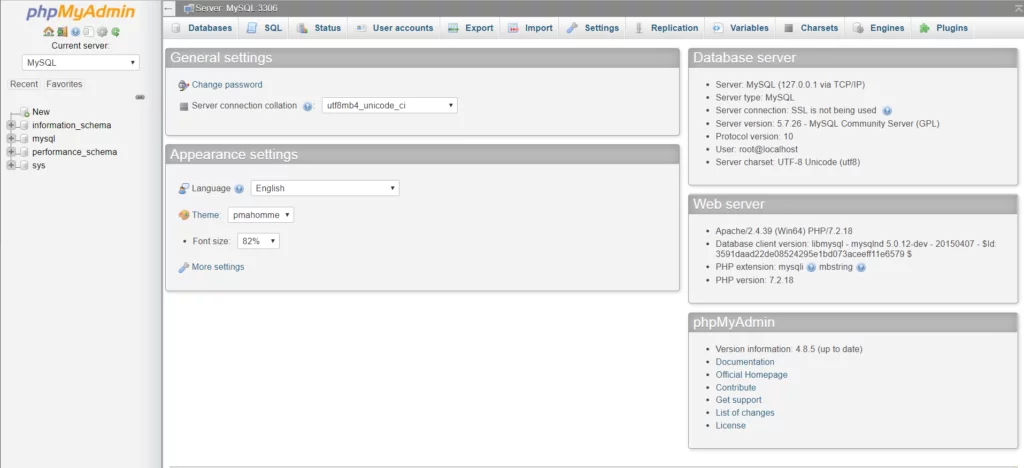
Leave the password field blank. These are the default credentials. Once you click on “Go”, you will see the phpMyAdmin Dashboard.
Click the “Databases” tab. Here you can create a new database.
Choose a name for your database and click on create.
Here I have created a database with the name “nestify”. You can choose any name you want.
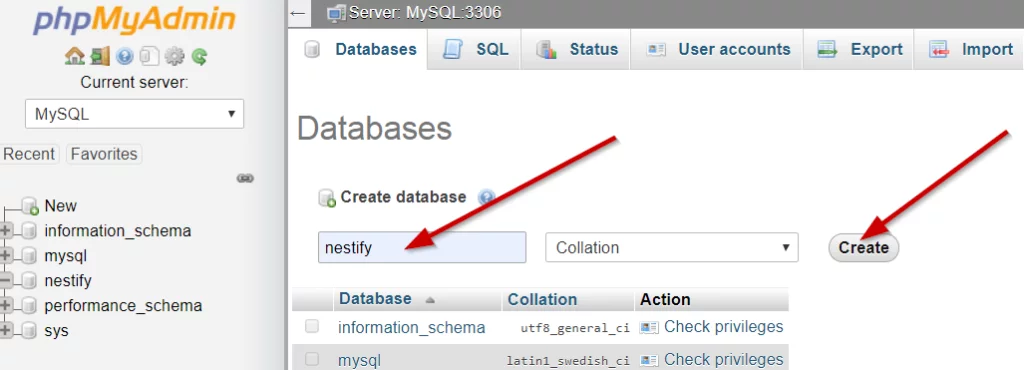
You have successfully created your database.
Step 4: Download WordPress
Once you set up phpMyAdmin, you can now proceed to the next step, i.e. downloading WordPress.
Head over to the Official site of WordPress: WordPress.Org
On the home page, you will find the button “Get WordPress”. Click on it.

This will take you to the download page where you can download the WordPress software for free.
You will get a zip file. Unzip it and extract the folder wordpress to a convenient location.
Copy the wordpress folder.
Locate the folder where you installed WAMP.
For example, in this tutorial, I have installed WAMP in c:\wamp64 folder.
In that folder, you will find a folder www
Paste the wordpress folder in www folder.
You can now access WordPress from your browser.
Step 5: Set up WordPress
Go to https://localhost/wordpress
WordPress language setup page will appear. Choose your default language and click on “Continue”.
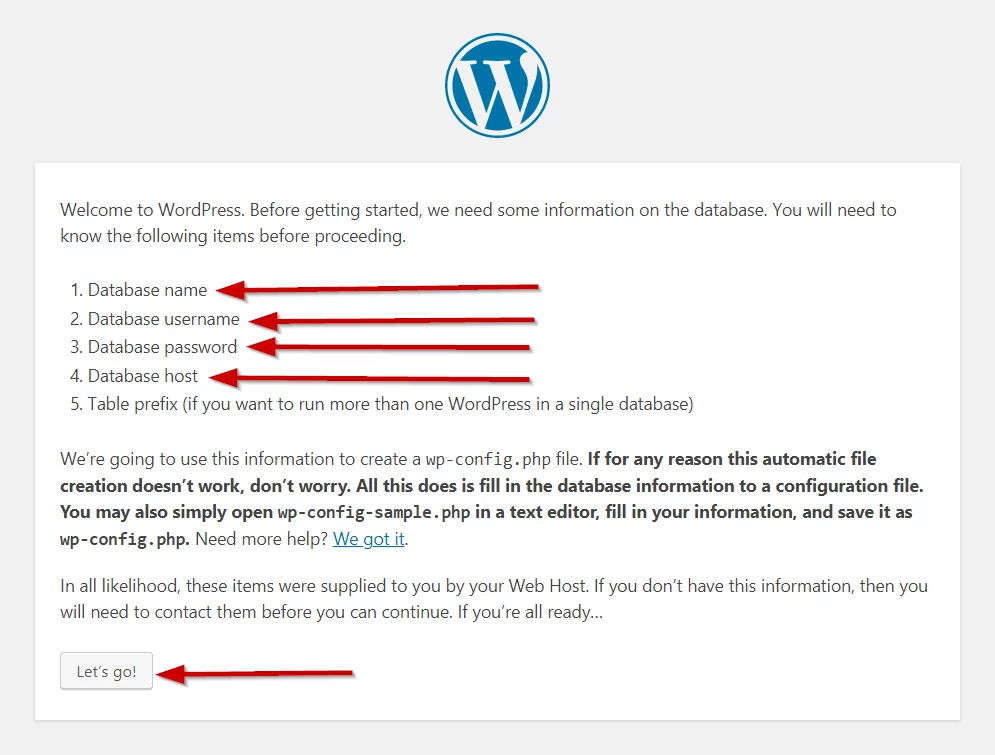
The next screen asks you to note the following things before proceeding further:
- Database name
- Database username
- Database password
- Database Host
- Table Prefix (if you want to run more than one WordPress in a single database)
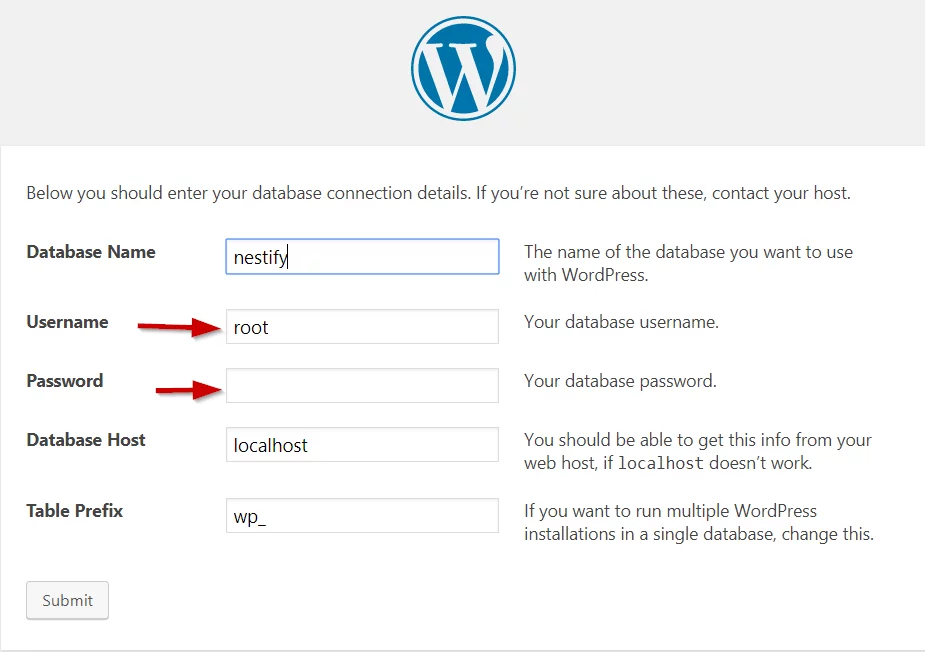
On the next screen, enter the following information:
Database Name: nestify (enter the name you chose for the database in step no. 3)
Username: root
Password: (leave this field blank)
Database Host: (leave this field as it is)
Table Prefix: (no need to change this)
Once you have entered the information, click on the Submit button.
Step 6: Complete WordPress Installation
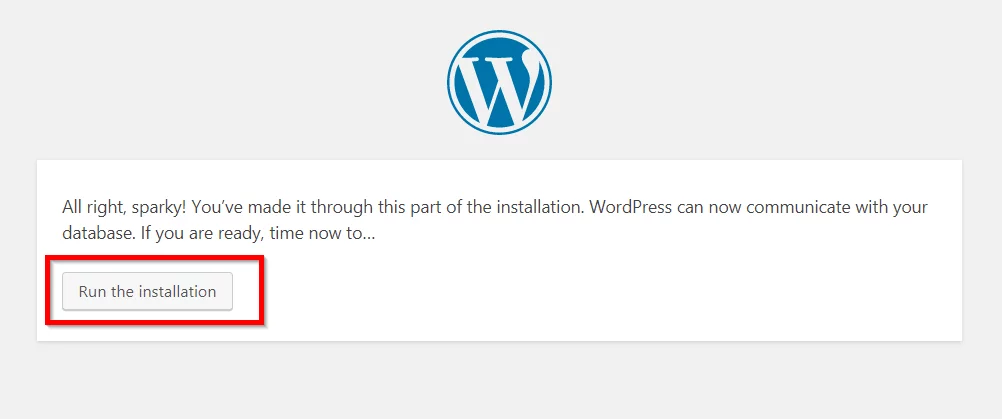
Once you click on the Submit button, you will see a screen that shows the “Run the Installation” button.
Click on it.
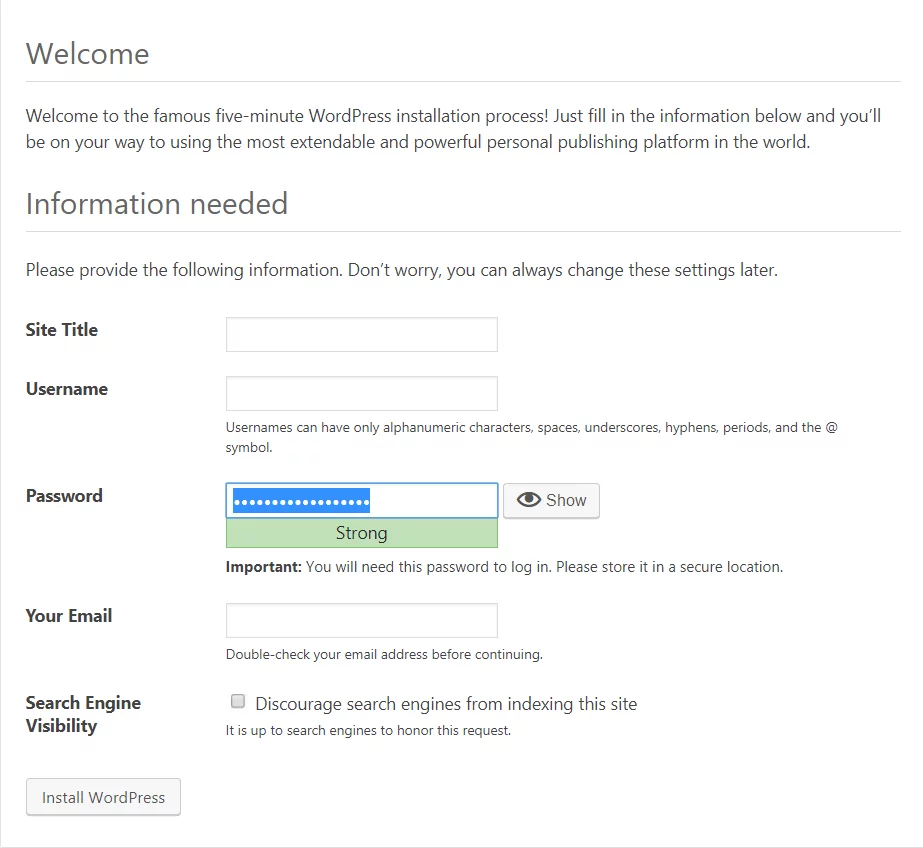
Once it runs successfully, you will see the WordPress Installation page that asks you fill information.
This includes:
- Site Title
- Username
- Password
- Your Email
- Search Engine Visibility
Fill in the details and click on the Install WordPress button.
Once everything goes well, you will see the Success message.
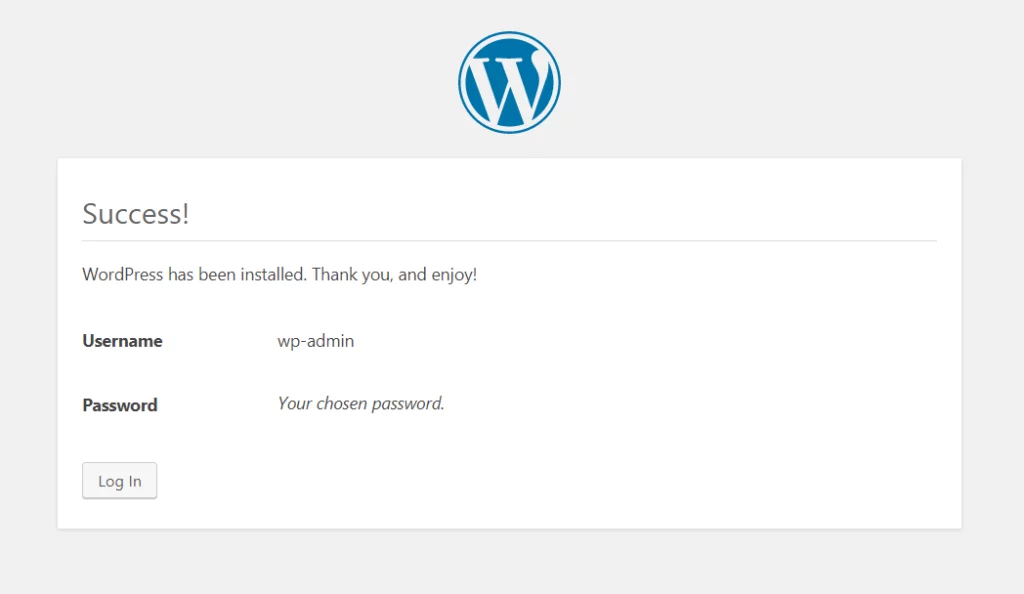
Congratulations! You have successfully installed WordPress locally using WAMP.
Now you can test your WordPress site, themes, plugins and enjoy your WordPress experience on your computer without needing a web host.
Hope this tutorial helped you. How was it? Do you have any questions? Do leave your comments.
