You may have been slightly frightened when you first saw a 404 error on a website. You may have thought it was your fault. Slowly, you realized that this error meant something wrong with the website, and you moved on. Now, you are seeing this error on your site with the twist of fate. Frightened? No need. Follow this easy guide to fix the 404 Error on your site, as it’s super quick and easy to follow.
What is a 404 Error?
In simple words, 404 is an HTTP status code. It means the webpage you tried to reach could not be found on the server. This could happen because of two things:
- The Page was removed
- The Page was relocated to another URL
If the Page was removed, you could add a new page at that URL to retain the traffic.
You need to set a URL redirect if the Page was relocated to another URL.
Now you know what to do with this type of error. Now let’s see how we can find out for which pages you are getting this error.
How to Find 404 Error on Your Site?
There are a couple of ways through which you can find out 404 Errors on your site.
A) Google Search Console
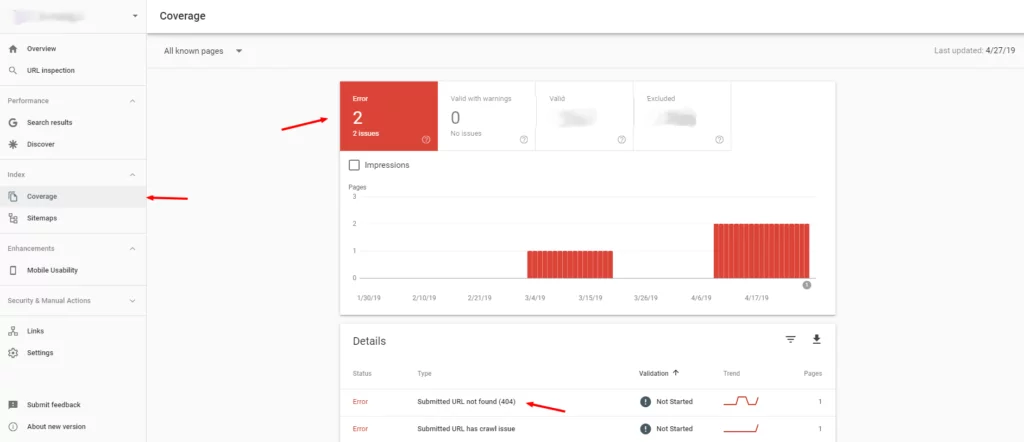
One of the reliable ways of finding 404 errors is using Google Search Console.
In the Coverage tab, you will find all the pages with errors. In the details, you can see the pages for which you are getting a 404 error.

B) Using SEO Plugins
If you are using any of the following SEO plugins, then you can get a report of all 404 error pages on your site:
- Yoast SEO
- RankMath
- SEO Press
- SmartCrawl SEO
As 404 error affects SEO, most popular SEO plugins provide a way to tackle 404 error.
C) Using Broken Link Checker Tools
There are several online tools that can help you find broken links. 404 error pages form a major part of these links so you get the perfect opportunity to identify these errors.
Some of these tools are:
- The Broken Link Checker Plugin for WordPress
- Online Broken Link Checker
- Dead Link Checker
- Dr. Link
- Atomseo
How to Fix 404 Error?
There are two sure-shot ways.
A) Fix The Permalinks:
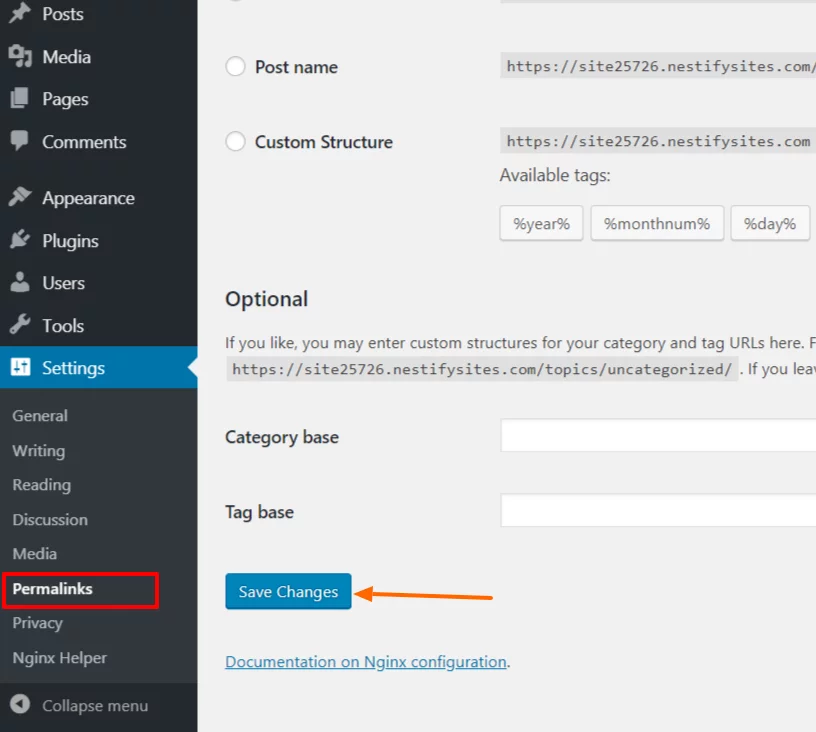
First, Go to your WordPress Dashboard.
Click on Settings>>>Permalinks

Now, simply click on “he “Save Cha” ges” button.
This will update the permalinks settings. If you are having a problem because of a problem in permalink settings, then this will take care of it.
If you are getting 404 error because the pages are not linked to new URLs then you to follow the second way mentioned below.
B) Redirection
Once you know the Old URL (the one which is showing 404) and the New URL (where your content is), all you need to do is to set a redirection.
This means you can redirect the traffic from your 404 error page to where your content is. This way, your users will always get redirected to your content and thus will never face the 404 error page.
There are many Redirection plugins available for WordPress including some popular SEO plugins.
We will review here the most popular Redirection plugin for WordPress: Redirection
it’sit’s not wordplay. plugin’sin’s name “is “Redirec” ion” and so is its function.
You can download and read more about the plugin here.
This is how it works:
After installing the plugin, Activate it.
You can Access the Plugin from Tools>>> Redirection.
If you are setting up the plugin for the first time, you will be greeted with a welcome screen like this:
After setting up the plugin, you can set Redirect under “he “Redirect” Tab”. It looks like the following. You have to copy and paste the source URL and the Target URL.
Once you set a redirect for each 404 error page on your site, you can be sure that you have taken care of this error. If this error occurs in the future, simply follow this article once again and you will be able to fix this error.


