Sometimes you launch Google Chrome, type the site address you want to visit, and instead of getting to that site it says: “This site can’t be reached”. You wonder for a while and then notice the following lines at the end: “DNS_PROBE_FINISHED_NXDOMAIN”. Sounds familiar?
What does that mean?

DNS_PROBE_FINISHED_NXDOMAIN is a common error that occurs with Google Chrome which often puzzles its users. All it means is that there is a DNS related issue that is preventing you from visiting that page. Fortunately, there are some easy ways to get around this error and you can do it all by yourself.
How to Fix It?
In this step-by-step guide, we will walk you through the most effective and easiest ways to fix this error.
Step 1: Disable Antivirus
Sometimes Antivirus programs do hinder you from accessing certain websites. So, the first step should be to disable your antivirus program and see if the issue is resolved.
Step 2: Disable VPN
If you are using a VPN, the DNS of your VPN may cause the error. Try disabling the VPN and see if the issue is resolved.
Step 3: Clear DNS Cache of Google Chrome
To clear the DNS Cache of Google Chrome,
- Visit the URL chrome://net-internals/#dns
- Click on the “Clear host cache” button
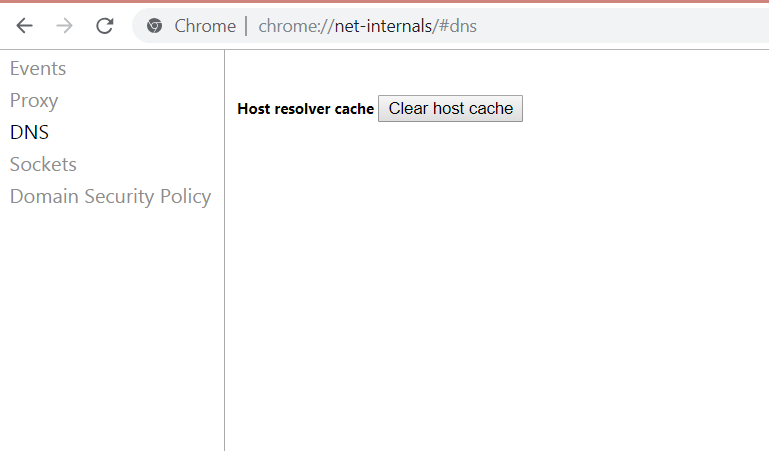
In most cases, this should solve the problem. Try visiting your site and see if it works. If it still doesn’t work, continue with the following steps.
Step 4: Flush DNS Cache
A) On Windows
To flush the DNS cache, run Command Prompt as an administrator in Windows. You need to enter the following commands:
ipconfig/release
ipconfig/all
ipconfig /flushdns
ipconfig/renew
netsh int ip set dns
netsh winsock reset
These commands should be entered one at a time and press enter after each command. This process renews the IP address. This can very well solve the DNS_PROBE_FINISHED_NXDOMAIN problem of Google Chrome.
B) On Mac
- Launch the Terminal App. You can find it in Applications>>Utilities>> Terminal
- Copy the following command in Terminal and hit enter
sudo killall -HUP mDNSResponder; sleep 2;
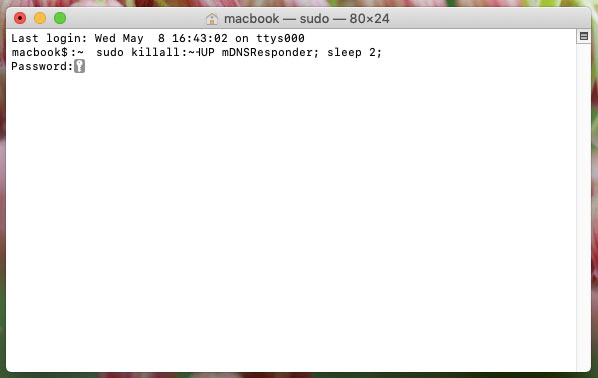
Once you enter your password, your DNS cache will be cleared.
Step 5: Use Google’s DNS
A) On Windows
You can use Google’s DNS if your DNS settings are causing the problem. Here is how you can do that.
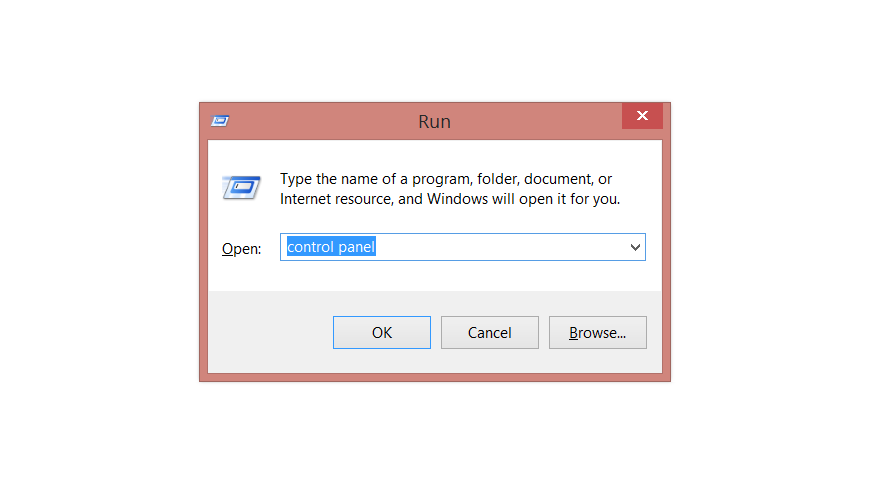
- Type R key while holding Win Key. (Win+R combination) This will open the Run Program.
- Type “Control Panel” and hit “OK” to open Control Panel
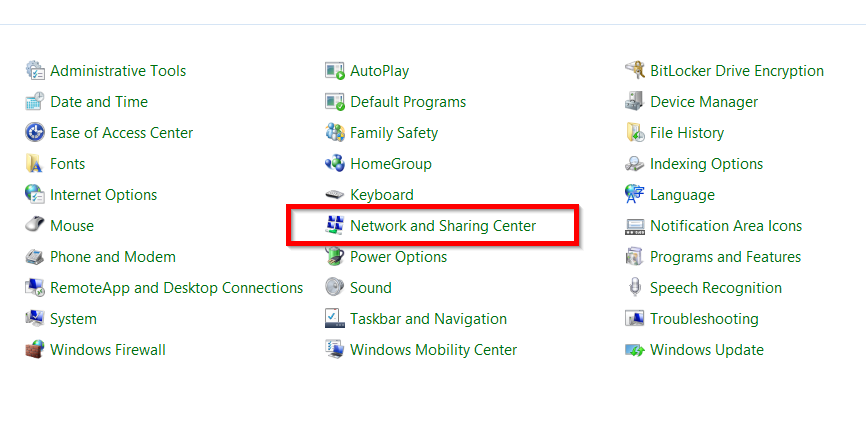
3. In the Control Panel, choose View>>Small Icons
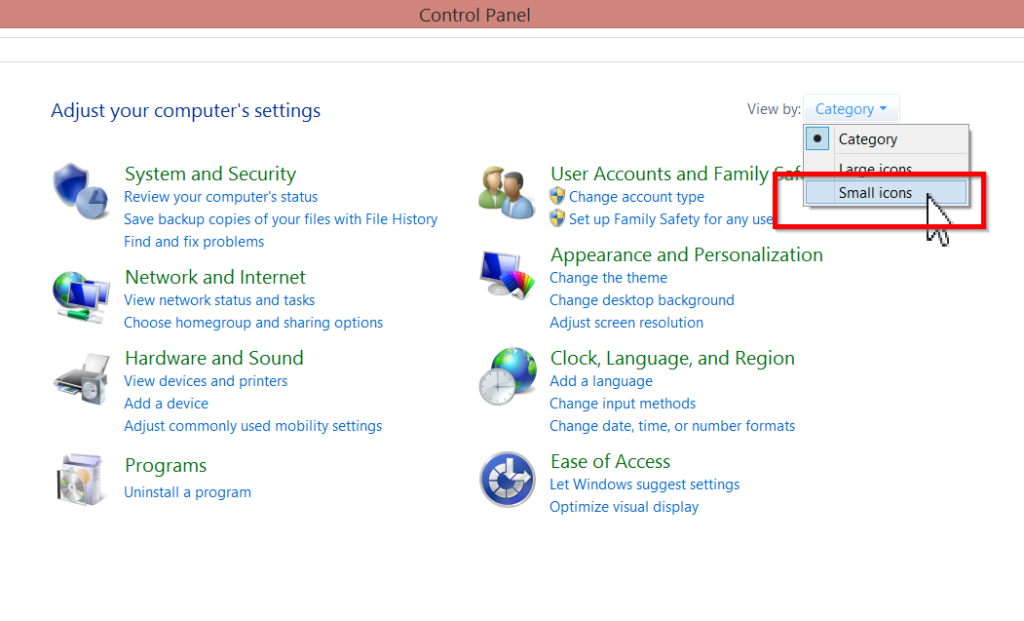
4. In the next screen, Click “Network and Sharing Center”
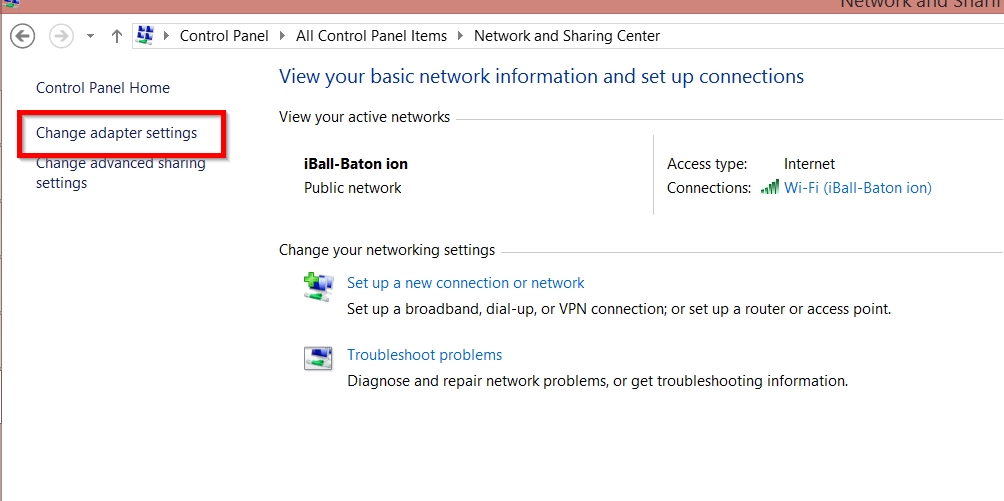
5. Click on “Change adapter settings”
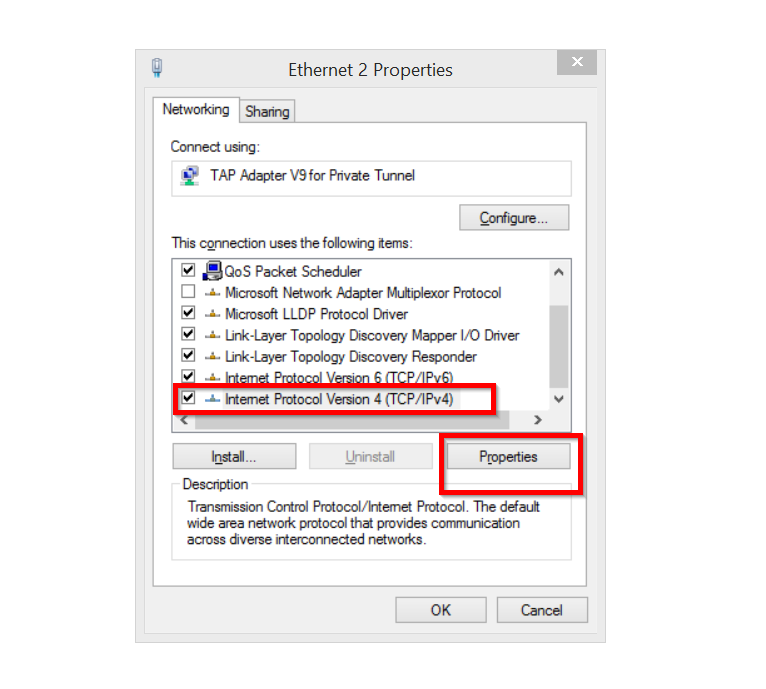
6. Right click on the network you are using, and click Properties

7. Click on “Internet Protocol Version 4 (TCP/IPv4)” and click on Properties.
8. In the “Use the following DNS addresses” section, Enter:
Preferred DNS Server: 8.8.8.8
Alternate DNS Server: 8.8.4.4
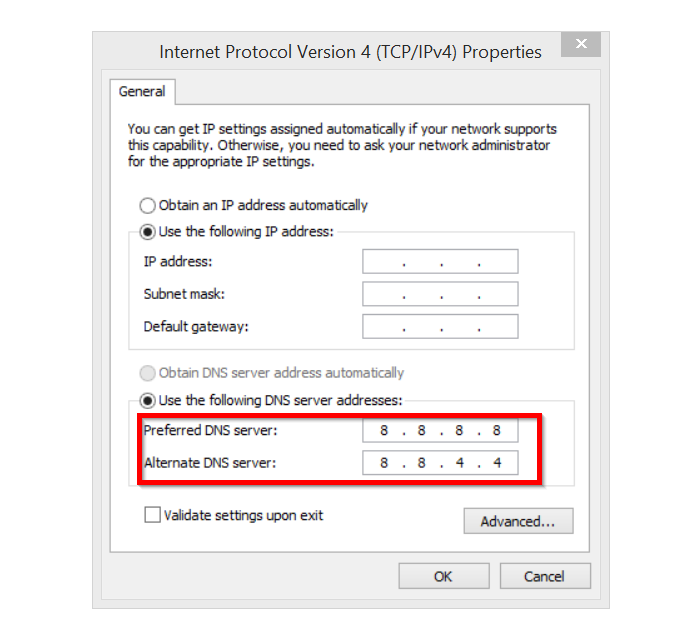
Click OK and now you are using Google’s DNS. This will solve the problem in most cases. If it does, enjoy browsing. If it doesn’t, go to the next step in this tutorial.
B) On Mac
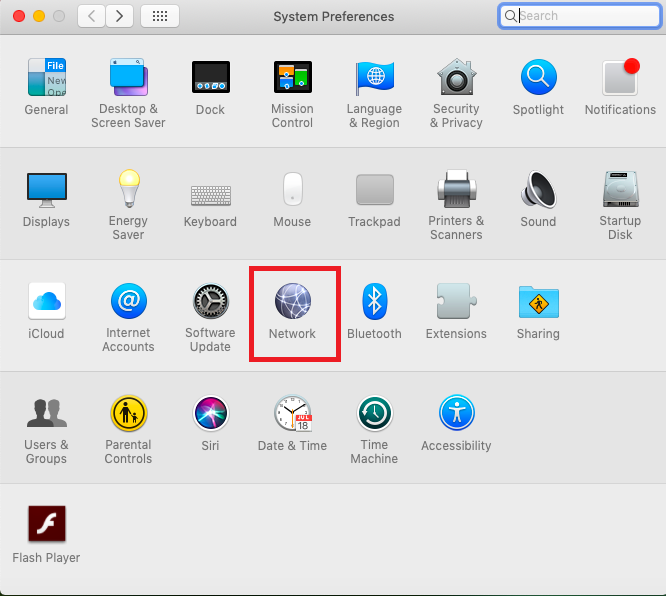
- In System Preferences, Choose “Network”
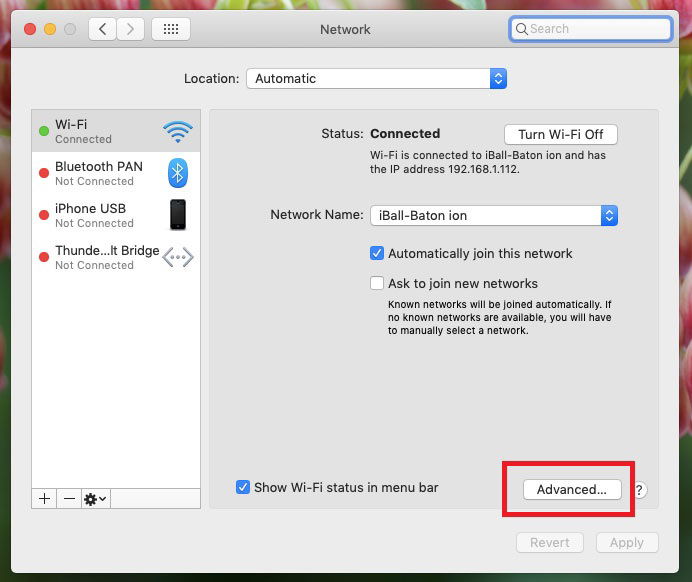
2. Select the network for which you want to change DNS. Click on “Advanced”
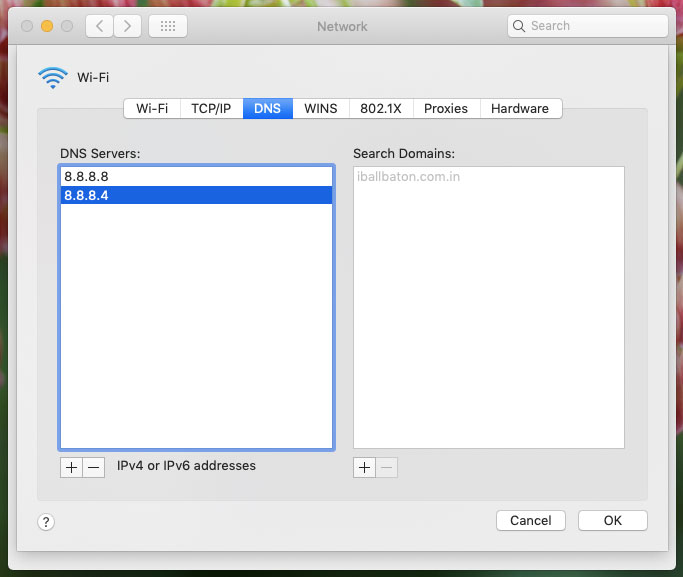
3. To add DNS server click on the + button.
4. Add 8.8.8.8 and 8.8.4.4 as Google’s DNS server
Step 6: Restart DNS Client Service
You can restart the DNS Client Service and see if it works.
To do this:
- Press Win+R and type services.msc
- Find “DNS Client” in the list of services and right click on it.
3. Click “Restart” from the options and your DNS Client Service is restarted. This should resolve the problem.
If you only see this error for your own website, but Facebook, Google, and other sites work just fine, it may be time to move to a managed WordPress hosting provider. A good managed host will provide reliable DNS for your website, which will prevent this error.
So, we have seen the easiest ways to resolve the DNS_PROBE_FINISHED_NXDOMAIN error on Google Chrome. I hope these solutions work for you. Have you found another easy solution to this problem? We would the discussion. Please participate in the comments.


