
WordPress plugins add to the functionality of WordPress by enabling you to do things that were not possible with the core WordPress installation. There are thousands of plugins in the WordPress ecosystem, both free and premium, that can bring real value to your WordPress website. In this tutorial, we will explain how to install a WordPress plugin.
Before going further, you need to know that we are not discussing WordPress.com. WordPress.com does not allow you to install plugins using their free plan. We are talking about open-source, self-hosted WordPress. (You might as well check out: What is the Difference Between WordPress.com and WordPress.org).
So you have got a fresh WordPress installed. You are now ready to install the plugins that you want. You need to know-how. Sit back, relax and let this tutorial help you install the plugins.
There are three ways to install a WordPress Plugin. For example sake, we are installing WooCommerce, a popular WordPress plugin. You can install any plugin you want. The steps remain the same and can be applied to any plugin.
- Through the WordPress Dashboard
You can install a WordPress plugin right from the WordPress Dashboard. It’s super easy.
Step 1: Click on the “Plugins” option in the Dashboard menu.
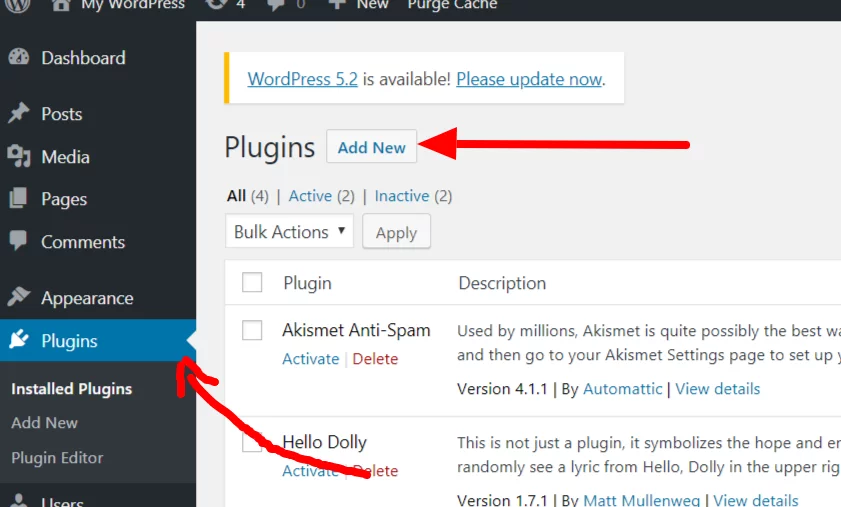
Step 2: The Plugins screen will appear. See the “Add New” button? Click on it to add a new plugin to your WordPress.
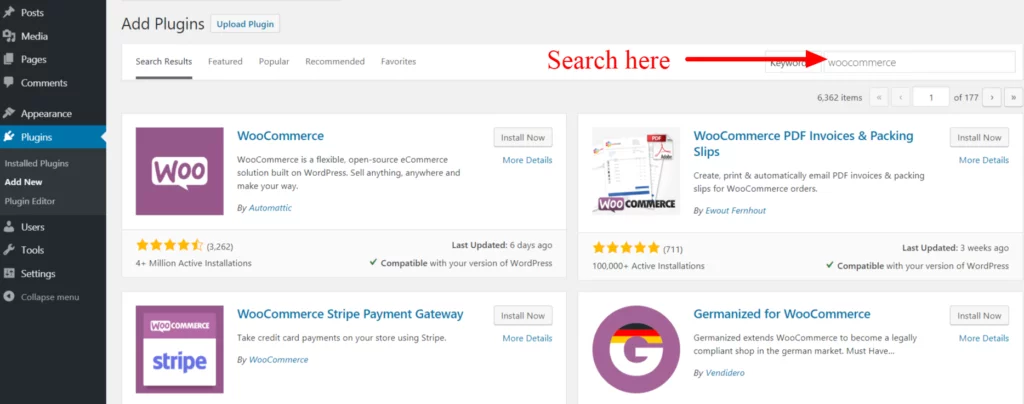
Step 3: On the next screen, you will see a couple of plugins and a search box. You can search for a specific plugin in the search box. Type in the plugin name and hit Enter. In this example, we have searched for Woocommerce.
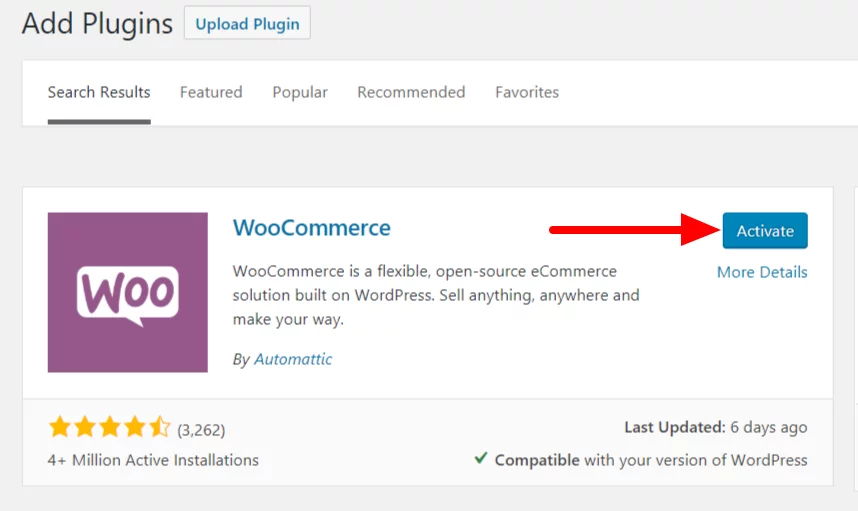
Step 4: You will see the results for your search term. Identify the plugin from the search results. In our case, Woocommerce is the plugin we are searching for. It appears first in the search results.
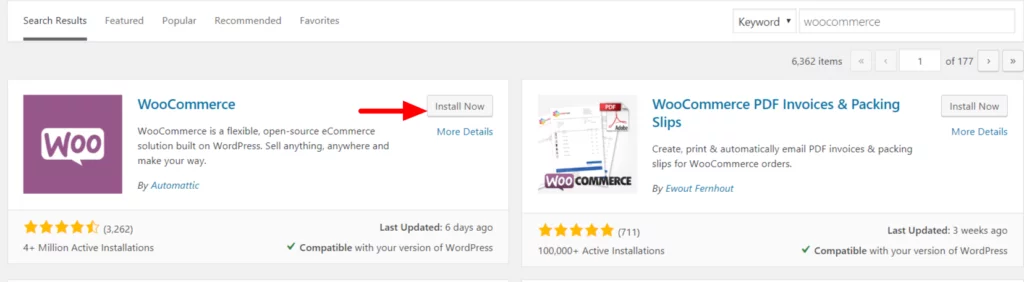
Step 5: Click on the “Install Now” button for your plugin. This will begin the installation process.
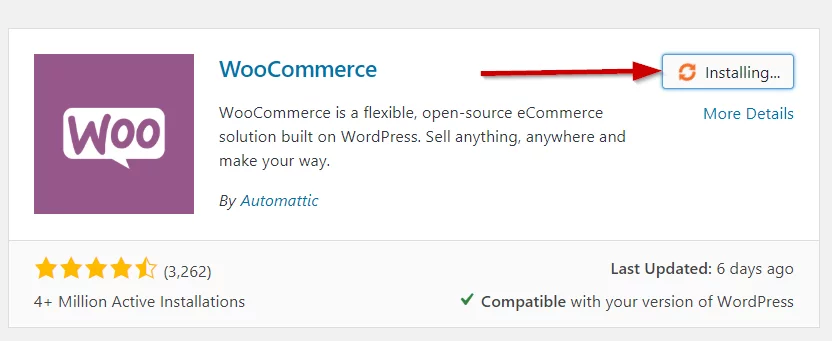
The installation is very fast and will typically finish within a few seconds.
Step 6: Once the plugin is installed, you just click on the “Activate” button to start using the plugin.
Congratulations! You now know how to successfully install a WordPress Plugin through the WordPress Dashboard.
B) Through Plugin Upload
Sometimes the plugin you want to install may not be available in the WordPress Plugin Repository. This is especially true for premium or paid plugins. In this case, you can choose to upload the plugin before installing it. This is how you can do it.
Step 1: Download the Plugin from the source (this will be a zip file)
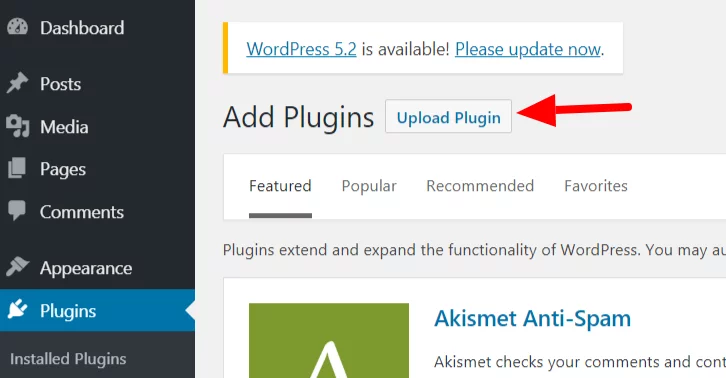
Step 2: Go to the WordPress Dashboard>>Plugins>>Add New

Step 3: You will the “Upload Plugin” button right beside “Add Plugins”. Click on it.
Step 4: You will now see an upload screen. Select your file and upload it.
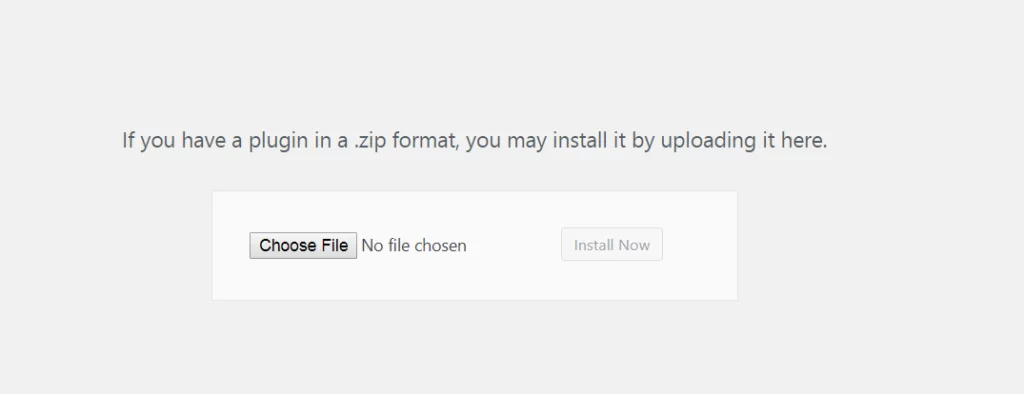
Step 5: After upload, Click on “Install Now.” Your plugin will now be installed.
Congratulations! You now know how to upload plugins through the WordPress dashboard. This way, you can install paid plugins easily.
- Through FTP
Another way to upload the plugin file to WordPress; is through an FTP connection. If you have the login credentials, you can use an FTP/SFTP client like FileZilla to connect to your site. You can get it from your site admin panel or directly ask your web host.
Here is how to add a plugin through FTP:
Step 1: Download the zip file of your plugin from the source. Extract the plugin folder. You will need this folder to upload via FTP
Step 2: Connect to your site from the FTP client on your computer
Step 3: Access the path wp-content/plugins
Step 4: Upload your Plugin folder here.

Step 5: Now visit the WordPress Admin Dashboard. Go to Plugins. You will see the plugin listed there. Click on “Activate” to activate the plugin.
Congratulations! Now you know how to upload the plugin using FTP.
Installing a plugin to your WordPress is easy and does not involve a complex setup. Each plugin, however, has its settings. For example, WooCommerce, the eCommerce plugin, has its exhaustive settings. Check out our beginner’s guide to using WooCommerce. Still, you can install any WordPress plugin using one of these three methods. We hope this tutorial made it an effortless task for you. Again, facing difficulties? Drop us a comment, and we will reach out to you.
