
Sometimes you try to upload an image to the media library in your WordPress site. All of a sudden, your image is not uploaded, and you return with “HTTP Error.” Just these two words are enough to confuse you as you have no clue about what went wrong. You are not alone. Millions of users face this problem at one point or another without any known reason.
“HTTP Error” is the error message you receive when your image fails to upload in the media library. There can be several things that can be causing this error. In this article, we are trying to fix this WordPress image upload HTTP error with 17 fixes that are sure to work. We have arranged these fixes from the easiest (read quickest) to the complex.
Let’s see how we can fix this issue.
- Wait and Refresh
- Resize the File
- Rename the File
- Clear Browser Cache
- Switch Browser
- Deactivate Plugins
- Disable Image Optimization
- Change Theme
- Use the “Add from Server” Plugin
- Reach out to Your Web Host
- Increase WordPress Memory Limit
- Switch to GD Library
- Limit Imagick to a single thread
- Update PHP version
- Remove Media Library path
- Tweak Mod Security
- Change Upload Folder Permissions
Before we begin, we want to remind you that we are going from easy to advanced options. If your problem gets solved with the easy fix itself, then well and good. However, if you need to try a superior alternative, then we recommend you first take a backup of your site. This will save you a lot of frustration if things go south. Check out these 12 Best Plugins to Backup your WordPress Website.
We do hope the error gets solved before you move to advanced options. We have tried to keep the complexity level to a minimum so that you can easily apply even the advanced fixes.
Let’s get started.
1. Wait and Refresh

Sometimes things aren’t as permanent as we think them to be. This also applies to errors. The HTTP error you are facing might be a temporary one. There might be an increase in your website traffic or the server is utilizing more resources, who can really predict?
Point is the best way is to wait for some time and see if you are able to upload the image. Just wait for some time, refresh your page, and try re-uploading your image.
No error? Wonderful. Pat yourself on the back and continue with your work. The Error was temporary after all. Hsshh! That definitely saved a lot of trouble.
2. Resize the File

The most common fix users have recommended for the upload error is to resize the image. Now, there is no hard and fast rule about how much or to what extent you should resize. Generally, it is found that if you resize the image to a smaller size, you may avoid this error.
To give you a perspective, one WordPress user reported that she was able to upload a small size image (96KB) without any error but the problem came when she tried a larger image (480 KB).
So there can be an issue with the file size. Use online tools to resize your image and try uploading the image again. If it works, well and good, otherwise keep reading through the following fixes.
3. Rename The FIle
Another common cause with image files is that they have weird names. And by weird we mean they have insanely long names. Some image names contain special characters. Even an apostrophe in the image name is known to cause errors.
Keep your image name short and sweet and you may as well be spared from the error.
4. Clear Browser Cache
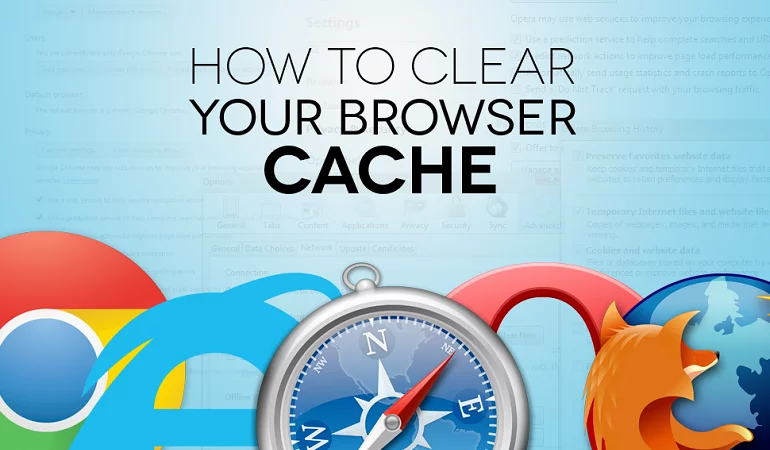
If all the above simple fixes fail, then try this one. You should see if clearing your browser cache can solve the error. If you don’t know what browser cache is or you need to know how to clear browser cache, then we suggest you read this simple guide:
How to Clear Browser Cache in The Latest Versions of All Major Browsers.
By clearing the browser cache, you can check if the issue is with browser cache. If it is, the error will be resolved at this step itself. If not, continue exploring the options.
5. Switch Browser
Sometimes the problem may be with the browser itself. In such a scenario, switching to a different browser might avoid the error. You should definitely try this simple fix before proceeding with other options.
6. Deactivate Plugins
The reason you are not able to upload an image to your media library may be related to one of the plugins you are using. Some plugins are known to cause problems with uploading.
The best way is to deactivate your plugins temporarily and try uploading the image. If the image is successfully uploaded then you can be sure that the problem is with one of your plugins. Now, try to activate plugins one-by-one, upload the image and check which plugin is causing the error.
Once you find out the culprit, you know what to do next.
7. Disable Image Optimization

If you are using an image optimization tool and getting the HTTP error despite that, then try disabling image optimization process. See if you can upload images if the image optimization is taken out of the equation. If it does, that solves your problem!
If not, then read on!
8. Change Theme
We have tried deactivating the plugins. That may not have solved the problem. The next likely candidate is your theme. A WordPress theme can hinder some images to be uploaded. To be sure, take a backup of your site and change your default theme.
Changing the theme can solve the problem in some cases. There is no guarantee that this fix will work but there is no harm in trying this option either.
Change your theme and see if this error disappears for you.
9. Use the “Add from Server” Plugin
There is a plugin called “Add from server” which can help you resolve some of the issues with image upload HTTP error. It has more than 100k active installations. However, note that this plugin is not tested with the latest 3 major releases of WordPress. It may have compatibility issues with the latest version of WordPress.
What does this plugin do?
- It is designed for importing singular large files which could not be uploaded through the admin interface
- You can upload a bunch of files via FTP and import those files from the web server directly into WordPress
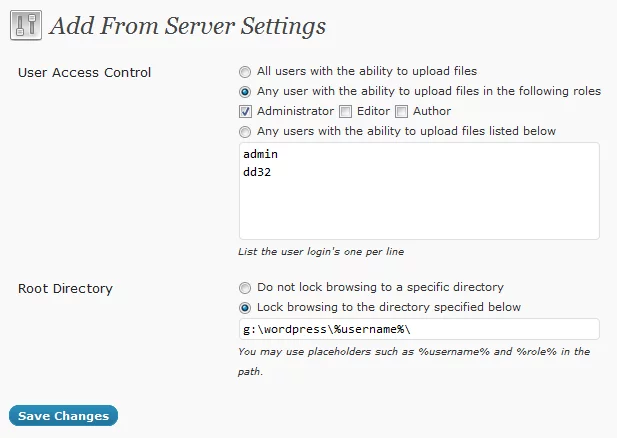
Note that this plugin is not an alternative to the default media uploader.
10. Reach out to your Web Host

If none of the above steps work out for you then this is the time to reach out to your host. You are paying for hosting and you deserve your problems to be solved by your web host.
The next few fixes can be better handled by your web host. Your web host can fix these things for you or rather they should. At this stage, you host will at least respond with the reason for the problem or on a brighter note, with the solution for the same.
Many users have commented that after they contacted their web hosts, their problem was resolved. Why waste time in trying out complex solutions when the error can be fixed by your web host?
In the unlikely event, your web host does not resolve the error for you then you will know you need to switch to another host. A managed WordPress hosting solution like Nestify can be a better option.
While you think of changing your web host, there are still a few steps that you can take to resolve the HTTP error. Keep on reading.
11. Increase WordPress Memory Limit
One of the fixed solutions for the HTTP error you will find on the internet is to increase the WordPress memory limit.
All you need to do is to add the following code to your wp-config.php file.
define( 'WP_MEMORY_LIMIT', '256M' );
This increase the default memory size to 256MB which works well in most cases. However, you need to check with your host if you can override this setting.
12. Switch to GD Library
WordPress uses two different PHP modules for image processing: Imagick and GD Library
Imagick can exhaust the available memory and cause the HTTP error. Therefore you should make the GD Library your default editor.
How can you do that?
Just add the following code to your theme’s functions.php file.
function wpb_image_editor_default_to_gd( $editors ) {
$gd_editor = ‘WP_Image_Editor_GD’;
$editors = array_diff( $editors, array( $gd_editor ) );
array_unshift( $editors, $gd_editor );
return $editors;
}
add_filter( ‘wp_image_editors’, ‘wpb_image_editor_default_to_gd’ );
Save your changes and try uploading the image.
13. Limit Imagick to a single thread
The main problem with Imagick is its resource-exhaustiveness. If you can set a limit to that, then it might help in resolving the HTTP error. Here, we are trying to curb the super-fast processing of Imagick so that it does not exhaust the WordPress memory.
How do you do that?
Just add the following line of code to the top of your .htaccess file.
SetEnv MAGICK_THREAD_LIMIT 1
This limits the Imagick processor to a single thread. This should resolve the error in most cases.
14. Update PHP Version
Many times you face weird errors if your web host is not using the latest PHP version. As WordPress runs on PHP, the up-to-date version of PHP ensures performance boost. This means lesser errors and added functionality.
If your web host does not support the latest version of PHP, then you should consider switching to a faster host like Nestify which supports the latest PHP version.
15. Remove Media Library Path
When you are migrating from staging to a production environment, your media library path will remain unchanged. This may cause the HTTP error.
Check your “Media” tab from the “Settings” in your WordPress dashboard.

If it doesn’t mention a library path then it is perfect.
If it does mention a file path, then delete the path and click on “Save changes”
See if the error is resolved. If not, we have two more options to explore.
16. Tweak Mod Security
Mod security is a popular and open source cross-platform web application firewall (WAF). It provides real-time web application monitoring, logging, and access control.
Your web host might be running Mod security which may cause HTTP Error.
You can check this with your web host. If your web host cannot disable the Mod Security for you then you might have to take matters into your own hand.
If your web host is using Apache server, then you can add the following code to your .htaccess file to disable Mod Security.
SecFilterEngine Off
SecFilterScanPOST Off
17. Change Upload Folder Permissions
The only remaining fix for you to try is to change upload folder permissions.
How to do that?
- First, connect to your FTP site using an FTP client.
2. Go to the root directory of your WordPress site.
3. Select all the folders in the root directory. Right click and select “File Permissions”.
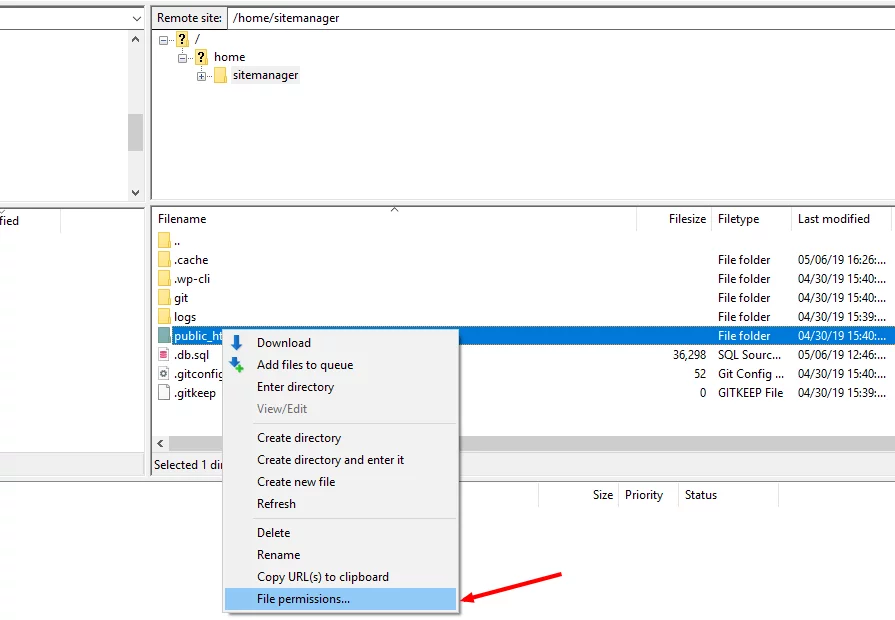
4. File Permissions dialog box will open. Enter 755 in the “Numeric Value” field.

5. Tick the box that says “Recurse into subdirectories”.
6. Select the “Apply to directories only” option. Click on “OK”.
By this time, we hope the error is resolved as you have exhausted all known options that you can use. The last hope in this scenario is your web host. If your web host can’t resolve this error for you then you can be sure that you need to move on to a better host. Nestify offers managed WordPress hosting that is known for its expert support and reliable custom solutions for its clients. We hope this article summarized all the possible HTTP error fixes for you. Do you want to add anything? Please let us know in the comments.
